Posts: 102
Threads: 5
Joined: Jan 2014
Location: USA
The following 5 users Like rubes's post:
EdK (04-13-2024), rleete (04-13-2024), f350ca (04-13-2024), arvidj (04-14-2024), Vinny (04-15-2024)
Last fabricated parts for this project...I think.
The center pin the table spins on was welded onto the bracket underneath, and I didnt figure that out till I drilled one out  .
It was just an ugly slotted screw anyway.
Made new ones out of a couple rusty old brake caliper bolts (dont throw anything away!!!). Single pointed the threads. I love threading with the Hardinge.
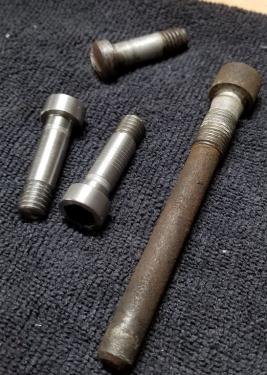
Hopefully pics of finished project coming soon. But its getting nice out, so yard work and car shows are calling.
Retired old guy finally living the dream and enjoying life to the fullest!!!
Posts: 102
Threads: 5
Joined: Jan 2014
Location: USA
04-13-2024, 11:15 AM
(This post was last modified: 04-13-2024, 11:18 AM by rubes.)
I think I'm calling these done. Sprayed the rolling surfaces and ball bearings with a dry TFE lubricant so grease wont attract dirt.
The left side one has extra holes cause when I got them, they were both rights so I had to redrill to make it a left. now that I see them done, I think I need to drill extra holes in the right or I'll go crazy.
You can see why I wanted to blacken the aluminum bits. IDK, maybe the contrast is OK...suppose it will have to be 
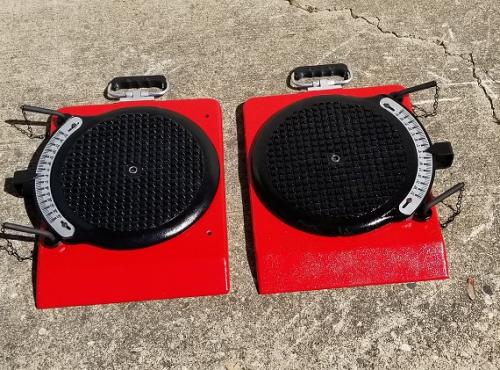
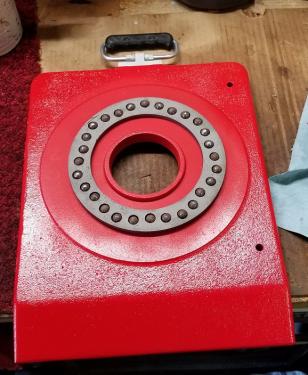
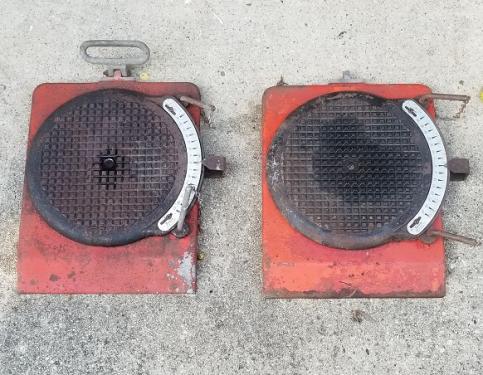
Before
Retired old guy finally living the dream and enjoying life to the fullest!!!
Posts: 8,889
Threads: 320
Joined: Feb 2012
Location: Arizona/Minnesota
Nice job! 
Ed
Posts: 795
Threads: 52
Joined: Mar 2012
Location: Rochester, NY
The following 6 users Like rleete's post:
EdK (04-13-2024), rubes (04-13-2024), f350ca (04-13-2024), arvidj (04-14-2024), JScott (04-14-2024), Vinny (04-15-2024)
04-13-2024, 12:54 PM
(This post was last modified: 04-13-2024, 12:55 PM by rleete.)
I saw a video a while back for a chisel sharpening system that uses 3M Cubitron sandpaper mounted in a drill press.
This Woodworking Jig Will Change Tool Sharpening Forever! (youtube.com)
Being that I hate to sharpen chisels, I decided to try it. But they wanted $17 a pop for 2 acrylic discs and two arbors. Uh, no thanks. I have some drops of 12L14 I bought a while back for making a rotary broach (which still isn't made, go figure), and one piece was enough for 2 mandrels.
The stuff cuts much easier than plain cold rolled, which is important for me with my small lathe. Believe it or not, this is the finish I got straight off the lathe with no filing or sandpaper. As you can see on the larger end, I did get some serious chatter before I figured out to crank up the speed. But I'm happy with how it turned out. BTW, that taper was cut freehand, because I'm too lazy to set the compound.
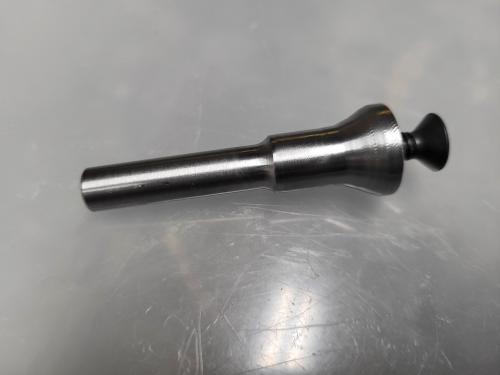
Then I rough cut some 2024 Ali plate for the disc. Mounted it on the mandrel and turned the outside edge. Man, did it sing! Loud enough that I considered finding some earplugs, but it cut fast enough that I didn't bother.
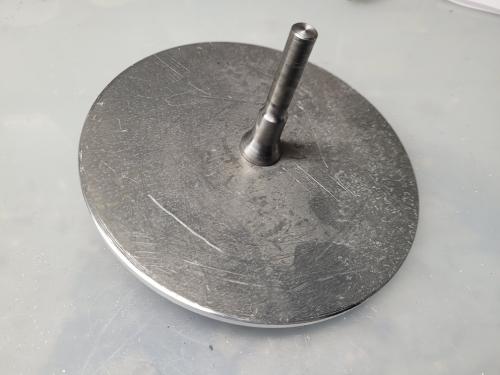
Next step is to make the jig to use in the drill press, which holds the chisel at the correct angle for consistent results. I'll be making that out of PVC instead of wood, as I really like working with it, and still have plenty of scraps on hand.
Full of ideas, but slow to produce parts
Posts: 795
Threads: 52
Joined: Mar 2012
Location: Rochester, NY
The following 5 users Like rleete's post:
f350ca (04-25-2024), JScott (04-25-2024), EdK (04-26-2024), arvidj (04-26-2024), Vinny (04-29-2024)
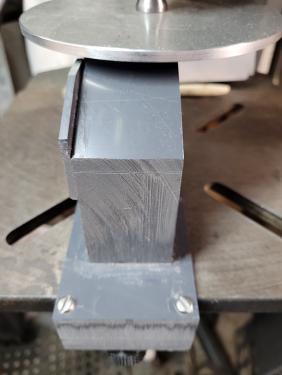
Finally got the fixture completed. It's not pretty, but it does the job.
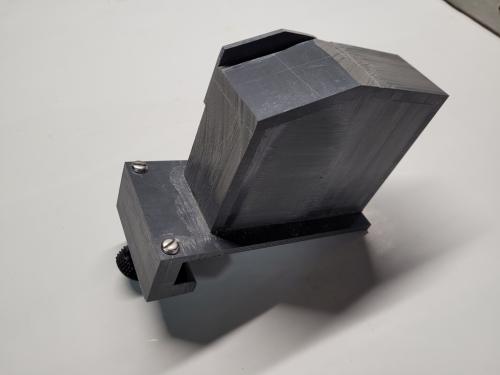
I made a minor modification to the original fixture (naturally), which goes over the edge of the drill press table and locks it in place. Ed, that's a 3D printed knob from Thingiverse. I had to angle the knob, because the table has a recessed skirt that extends down about 2 inches. Without the angle, the knob interfered with the table. I also cut a much smaller angled shelf, as my chisels are short, and I didn't want the handles contacting the fixture, and possibly ruining the angle.
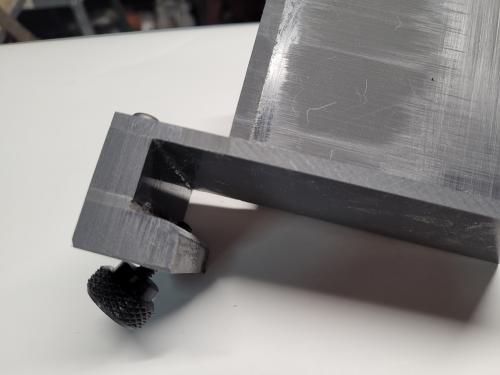
And finally a picture of the view you have when you start to sharpen. You hold the chisel face up against the angled surface, and slide it along the small fence on the left. You only have to barely kiss the chisel to the sandpaper to get a really good edge. The fixture takes out all the guesswork or setup to achieve the right angle. I'll eventually attach the leather strop to the top surface of the disc to get that final hone.
Full of ideas, but slow to produce parts
Posts: 795
Threads: 52
Joined: Mar 2012
Location: Rochester, NY
The following 6 users Like rleete's post:
rubes (04-27-2024), arvidj (04-27-2024), Hawkeye (04-27-2024), EdK (04-28-2024), JScott (04-28-2024), Vinny (04-29-2024)
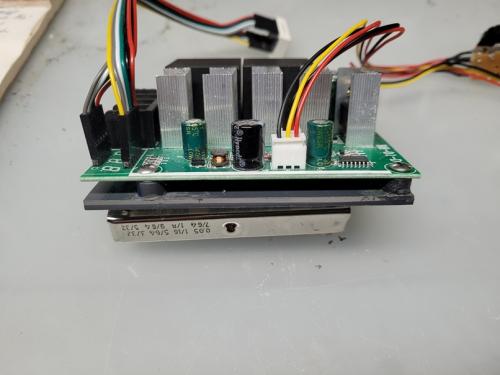
I'm sure you electronic hobbyists will get a laugh out of this. I needed some board spacers to mount this control board. Not usually working with electronic stuff, I didn't have any. Rather than order some online and wait, I decided to make my own. About the only plastic I have is PVC, so I took a piece of 1/2" stock, chopped off a piece and used a plug cutter to make the end round. I then chucked it in the lathe and turned my spacers as shown.
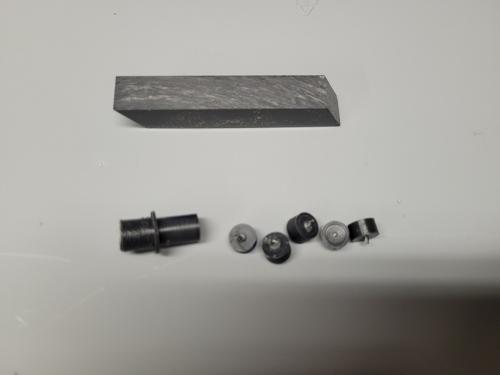
And this is the final piece. The board mounts into an enclosure, and is the control board for my x-axis power feed.
Full of ideas, but slow to produce parts
Posts: 8,889
Threads: 320
Joined: Feb 2012
Location: Arizona/Minnesota
The following 1 user Likes EdK's post:
rleete (04-28-2024)
You could have 3D printed them. 
Ed
Posts: 102
Threads: 5
Joined: Jan 2014
Location: USA
The following 1 user Likes rubes's post:
EdK (04-28-2024)
(04-28-2024, 01:07 AM)EdK Wrote: You could have 3D printed them. 
LOL...good one. I didnt think of that either, duh!!
Retired old guy finally living the dream and enjoying life to the fullest!!!
Posts: 795
Threads: 52
Joined: Mar 2012
Location: Rochester, NY
Never even occurred to me. Ender hasn't been turned on in months.
Full of ideas, but slow to produce parts
Posts: 536
Threads: 39
Joined: Jan 2013
Location: Kelowna, BC, Canada
I have a good stash of plastic tubing in various sizes. Sometimes, I just slice off a few short pieces and use small bolts and nuts to make up stand-offs.
Mike
If you can't get one, make one.
Hawkeye, proud to be a member of MetalworkingFun Forum since Jan 2013.
|
 .
.
 .
.


