Posts: 536
Threads: 39
Joined: Jan 2013
Location: Kelowna, BC, Canada
You talked me into it, Willie. I just ordered 100 in 5 grits. I could get a similar finish with my little sandblaster, but that's SO messy. Besides, it's getting cold outside.
Mike
If you can't get one, make one.
Hawkeye, proud to be a member of MetalworkingFun Forum since Jan 2013.
Posts: 4,493
Threads: 187
Joined: Feb 2012
Location: Missouri, USA
(12-15-2023, 10:59 PM)Hawkeye Wrote: You talked me into it, Willie. I just ordered 100 in 5 grits. I could get a similar finish with my little sandblaster, but that's SO messy. Besides, it's getting cold outside.
Same here Mike. I've used my bead blaster a lot for finishing larger parts. But like you say it can be messy. The little buffs are really handy for small jobs. The only caveat is that you get what you pay for. You can get them cheap from China or Amazon but they are thin on material and disintegrate pretty quickly. The more expensive buffs are denser and stand up to more use. I found out about them from a place that sells tools for jewelers. Apparently dentist offices use them a lot as well. No idea what for. 
I've got Scotch-Brite in multiple forms. Hand pads, Roloc discs, "sanding" belts and the little 1" buffs. Oddly enough I have never gotten around to getting a deburring wheel for the bench grinder. 
Willie
Posts: 795
Threads: 52
Joined: Mar 2012
Location: Rochester, NY
The following 3 users Like rleete's post:
Highpower (12-16-2023), EdK (12-16-2023), Vinny (12-17-2023)
12-16-2023, 09:48 AM
(This post was last modified: 12-16-2023, 09:50 AM by rleete.)
(12-15-2023, 06:20 PM)EdK Wrote: (12-15-2023, 02:46 PM)rleete Wrote: Ever since I bought that deburring wheel
Do you have a link to the deburring wheel?
Ed
I bought a knockoff, as they are so much cheaper. But they do wear faster, especially with harder materials.
Amazon.com: AmaCupid Nylon Fiber Brushed Buffing Wheels 6 Inch 5P Hardness. for Bench Grinder Buffing Machine Polishing Copper, Aluminum, and Titanium Alloy 180 Grit, 1/2 inch Arbor, 1 inch Thickness : Industrial & Scientific
They come in various hardness levels. The harder ones might last longer when using on steel, but I wanted one that wouldn't cut too aggressively on aluminum. Overall, I am very satisfied, and would buy it again.
I also bought some smaller ones (roughly 1.5" diameter) from eBay, which I used in the drill press to polish that bottle holder I posted a few pages back (pg 540).
Full of ideas, but slow to produce parts
Posts: 8,888
Threads: 320
Joined: Feb 2012
Location: Arizona/Minnesota
(12-16-2023, 09:48 AM)rleete Wrote: I bought a knockoff, as they are so much cheaper. But they do wear faster, especially with harder materials.
Amazon.com: AmaCupid Nylon Fiber Brushed Buffing Wheels 6 Inch 5P Hardness. for Bench Grinder Buffing Machine Polishing Copper, Aluminum, and Titanium Alloy 180 Grit, 1/2 inch Arbor, 1 inch Thickness : Industrial & Scientific
They come in various hardness levels. The harder ones might last longer when using on steel, but I wanted one that wouldn't cut too aggressively on aluminum. Overall, I am very satisfied, and would buy it again.
I also bought some smaller ones (roughly 1.5" diameter) from eBay, which I used in the drill press to polish that bottle holder I posted a few pages back (pg 540).
So you must have a low speed grinder to run those wheels since the recommended range is 1800-2800rpms with a maximum speed of 3000rpms. 
Ed
Posts: 795
Threads: 52
Joined: Mar 2012
Location: Rochester, NY
12-16-2023, 02:30 PM
(This post was last modified: 12-16-2023, 02:30 PM by rleete.)
Mounted to my budget HF grinder which I've had for years. 3450 RPM, I just checked. Although I had to make a bushing for the wheel so it fit properly and ran true, I have had no problems running it at that speed.
Full of ideas, but slow to produce parts
Posts: 8,888
Threads: 320
Joined: Feb 2012
Location: Arizona/Minnesota
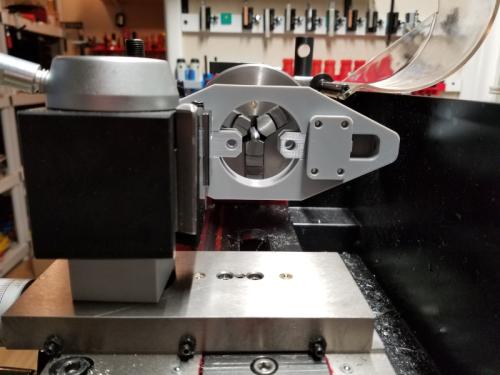
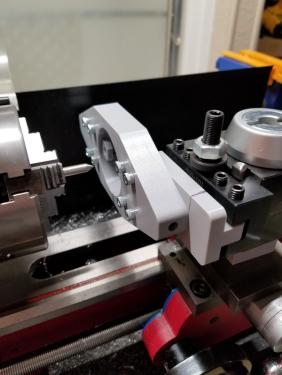
I worked on mocking up Tom's clamp knurling tool on the mini lathe. It appears I can make it work by mounting it differently on the QCTP. No dimensional changes at all except to the mounting bracket. Depending on the size of the stock to be knurled I may have to remove the back splash for knurling larger stock. Not the end of the world since I wouldn't need to do that very often. I think I'll make some thumb screws for the back splash to make it quicker to remove and replace. 
Ed
Posts: 795
Threads: 52
Joined: Mar 2012
Location: Rochester, NY
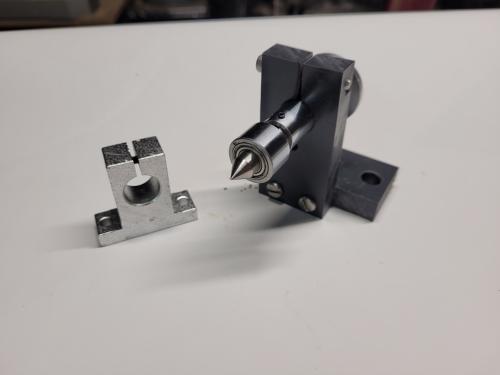
I think I posed a while back about a miniature live center that I bought. Well, the time for that project was ripe, so I made a new mount for it, in order to raise it up to the level I need as well as provide a way to secure it. PVC, because it is on hand, easy to work and does the job:
That made, I got to the setup for the real machining:
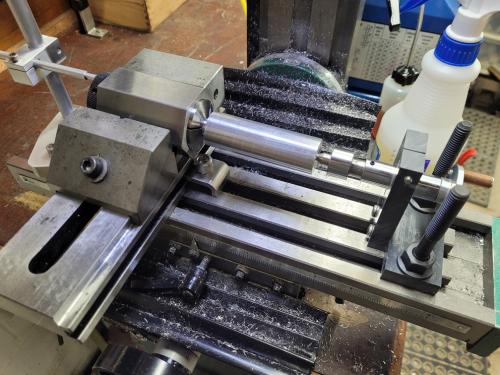
A 3/8" ball end mill and lots of chips later I had this:
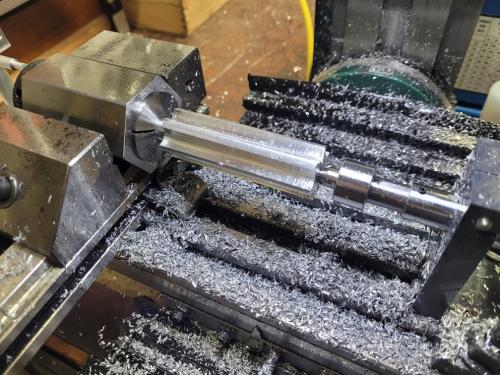
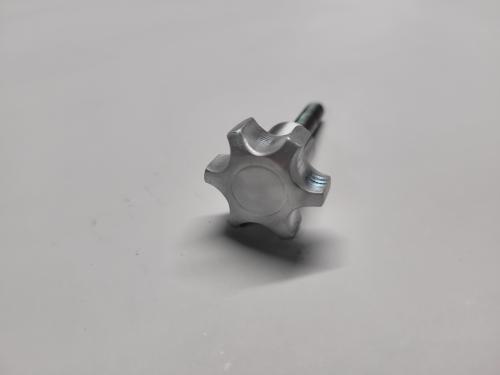
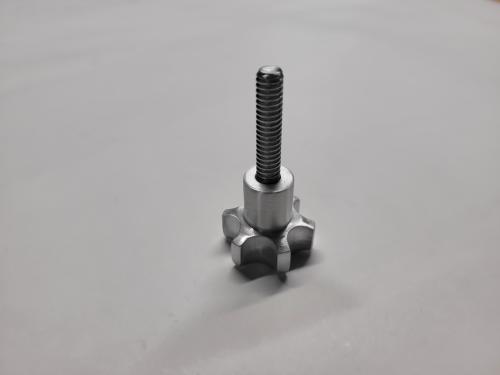
I put the piece in the lathe, drilled and tapped the end and then (after much head scratching) figured out how to set the compound over to 15 degrees to cut the chamfers top and bottom. A piece of threaded rod was inserted to end up with this fine knob:
And finally, in its place of use, on the mill stop I made earlier:
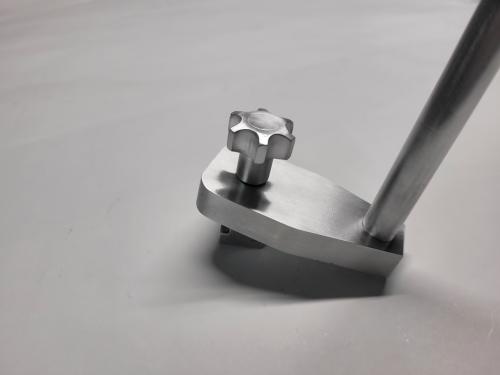
Look ma, no more tools required!
Full of ideas, but slow to produce parts
Posts: 795
Threads: 52
Joined: Mar 2012
Location: Rochester, NY
More knobs! When I originally made my mil stop, I used the method where you slit the block and use a screw to clamp it. It worked, but not well. The problem was it required a lot of force to clamp the rods, and it was a pain to hold them in position while cranking down on an allen key. You can see the marks in the original piece where the screw head has dug into the aluminum body after only a few uses.
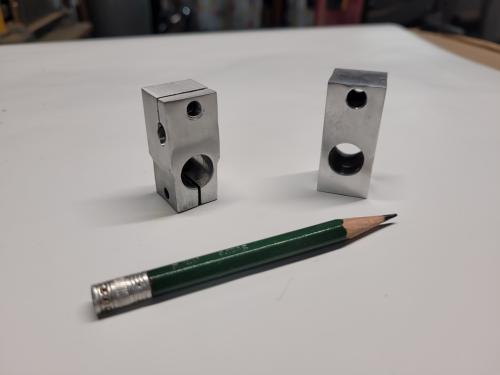
New knobs eliminated the use of tools to tighten, but it still took too much force. So, the answer was a different type of clamping system, in this case split cotters. This is the method used to lock the quill on many (most?) drill presses.
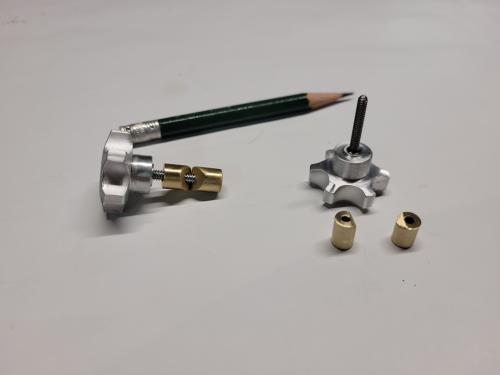
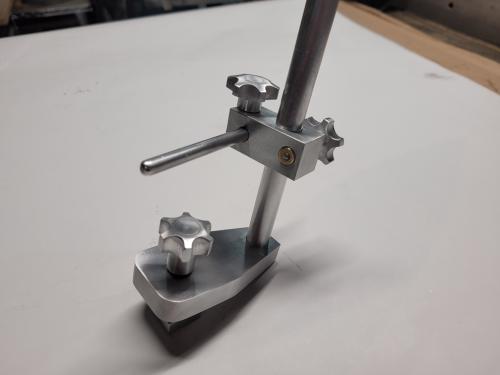
This method requires very little screw pressure to provide positive clamping force. Now, I can tighten the knobs with only light finger pressure to lock the rods in place.
Full of ideas, but slow to produce parts
Posts: 795
Threads: 52
Joined: Mar 2012
Location: Rochester, NY
The following 4 users Like rleete's post:
f350ca (01-07-2024), EdK (01-07-2024), Vinny (01-07-2024), arvidj (01-09-2024)
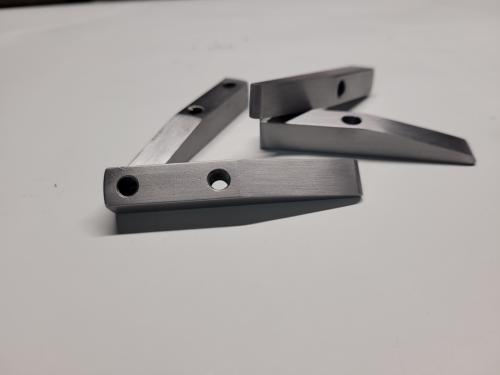
I have a bunch of parts where I wanted a large radius on the end. Rather than break down my existing setup on the mill, I made this quick and dirty fixture. Parts are set on the pin, and carefully rotated back and forth until the radius is fully formed. The HF sander doesn't have a lot of power, so care was taken to avoid stalling the belt.
The white stuff is some solid p.v.c. lumber scraps from a home improvement project. Drill was the same one used to put a hole in each part, so was a perfect fit.
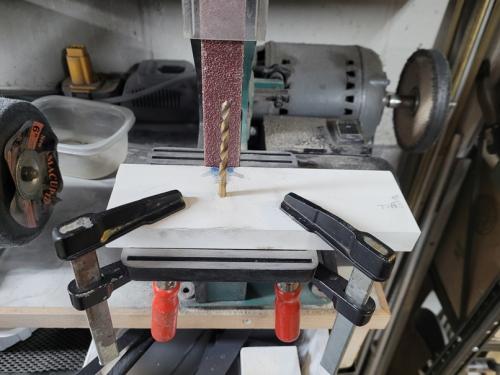
Someday I hope to make a "real" belt grinder, but until then, the HF sander has done well. Just like my undersized mill and lathe, you simply have to take it slow and not push too hard, and it will eventually get the job done.
Full of ideas, but slow to produce parts
Posts: 795
Threads: 52
Joined: Mar 2012
Location: Rochester, NY
And, these are the parts I made today:
Full of ideas, but slow to produce parts
|


