Todays Project - What did you do today?
(03-29-2014, 06:44 PM)EdK Wrote: Interesting David. What is it? Since it's sitting on the bed, I can only assume it's some sort of sexual fantasy device. Yikes

Ed

I was going to have a snappy response... but realized David was in OK. My daughter is at OSU.... so no comment. :)

Looks like the start of a nice CNC router.
roundrocktom, proud to be a member of MetalworkingFun Forum since Mar 2014.
Reply
Thanks given by:
(03-30-2014, 08:08 AM)roundrocktom Wrote: Looks like the start of a nice CNC router.

I'm hoping it turns out ok, I want it to cut casting patterns with.

I'm at a standstill at the moment waiting on the ball screws to arrive, fixing to hook up all the electrical stuff and see if they chinese left any smoke it the parts. the only thing it will do is let me know that the motors will turn and the I/O's are working.

DA
dallen, proud to be a member of MetalworkingFun Forum since Apr 2012.

If life seems normal, your not going fast enough! Tongue
Reply
Thanks given by:
Started making a drive plate for the Hardinge because the one that came with it is next to useless. Not sure what dogs they designed it for, but it doesn't fit anything in my collection. The plan is to make a cast iron disc that can be attached to the existing plate that is a larger diameter with matching slots. The cast iron was a donation from my son's barbell set (he doesn't use them anyway) and it actually turned pretty well. I would like Ken to take note that I am using carbide inserts both for turning and facing as well as for boring.

The project was interrupted by some automotive repair, so I wasn't able to finish it, but hopefully sometime this week...

Tom

[Image: photo_3_.JPG]

[Image: photo_2_.JPG]
[Image: TomsTechLogo-Profile.png]
Reply
Thanks given by:
Very nice finish you're getting on that cast iron. Ken will indeed be proud of you. Big Grin

Ed
Reply
Thanks given by:
Way to go with cast iron, Tom! If you had used HSS for that we wouldn't likely see photos for a couple more days. Big Grin
Reply
Thanks given by:
casted this handle for the shaper

   
dallen, proud to be a member of MetalworkingFun Forum since Apr 2012.

If life seems normal, your not going fast enough! Tongue
Reply
Thanks given by:
The mild(ish) temperatures today urged me to heat up the shop and get some work done on the new log splitter I brought into the shop last fall.
Incredibly I forgot to reinforce the top of the H beam I used for the splitter. I say "incredibly" because the first splitter I built had to have a thicker plate added to the top of the H beam where the pusher slid.

Some people don't learn. Bash
.
Here's the new ½" x 6" steel plate ready for welding to the H beam.
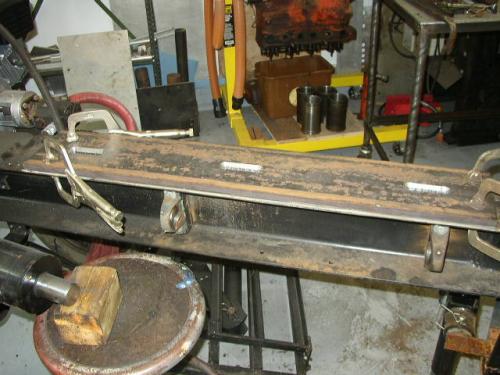
   

The plate is beveled as well as the H beam for the weld bead.
It also has 3 slots for welding down the centre and will be welded at both ends.
I had to sledge hammer the H beam that the log pusher had bent up due to unforeseen (and unremembered forces Bash) in order for the new plate to lie properly on it.

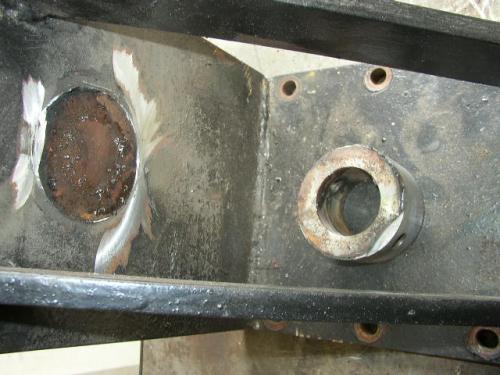
The log pusher had to have the collar for the ram moved up ½" to compensate for the new new slide plate.

I decided to try turning the boring bar in my boring head 180° and run the mill in reverse to cut off the weld.
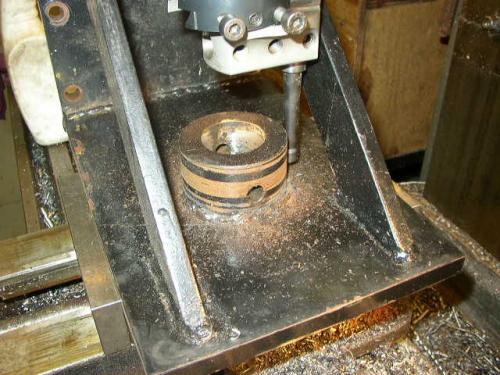
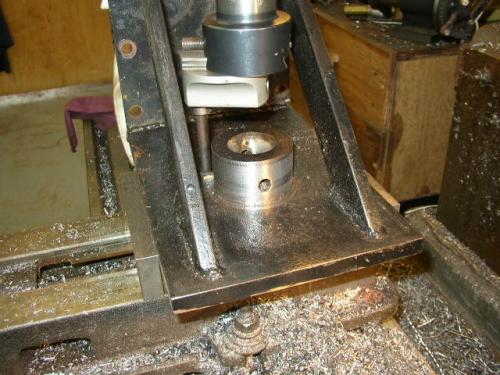


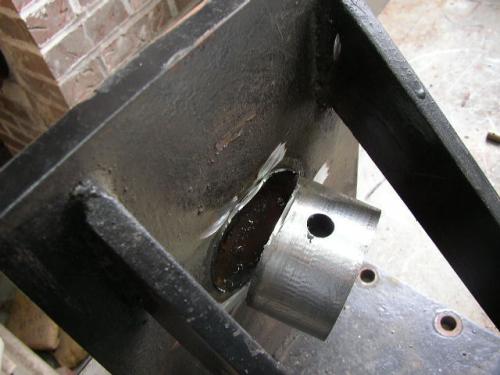
That procedure worked quite well, I was relying on the weld penetration not being too deep. I had not been concerned when I welded it because the only strength required would be retracting the pusher. I had to use a thin cut off wheel in a couple of spots but once that was done the collar pried off quite easily.


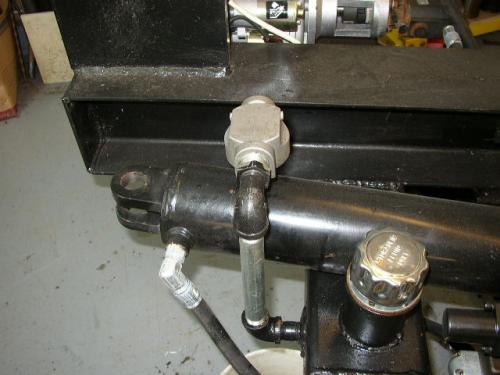
While disassembling the splitter for the above mods I decided to reposition the hydraulic filter, as it was if I were to unscrew the filter over ½ the fluid would have tried to pour onto the ground. Turn an elbow, add a longer nipple and re-route the return hose and that problem is solved.
   

More to report after the welding and reassembly.
Busy Bee 12-36 lathe, Busy Bee Mill drill, Busy Bee 4x6 bandsaw, Homemade 9x17 bandsaw, Ad infinitum.
Reply
Thanks given by:
Nice use of the boring bar to get the chunk off. Thumbsup

Ed
Reply
Thanks given by: stevec
Neat idea using the boring bar Steve. Looks like a close fit between the webs. If you haven't welded it yet I'd put a couple more holes in the middle to plug weld over the web of the I beam, think it would make a difference.
Free advice is worth exactly what you payed for it.
Greg
Reply
Thanks given by:
(04-03-2014, 08:24 PM)f350ca Wrote: Neat idea using the boring bar Steve. Looks like a close fit between the webs. If you haven't welded it yet I'd put a couple more holes in the middle to plug weld over the web of the I beam, think it would make a difference.

Greg, ya a close fit, especially with those allen head screws I used to replace the cheese setscrews that came with the boring head.
I figured those three 3" x ½" slots in the middle would be enough.
17428

The preceding three point splitter had it's "after thought" ½" plate only welded along the length of the sides.
Busy Bee 12-36 lathe, Busy Bee Mill drill, Busy Bee 4x6 bandsaw, Homemade 9x17 bandsaw, Ad infinitum.
Reply
Thanks given by:


Users browsing this thread: 11 Guest(s)