Posts: 65
Threads: 11
Joined: Jul 2012
Location: United States
05-16-2013, 06:14 PM
(This post was last modified: 05-16-2013, 06:59 PM by EdK.)
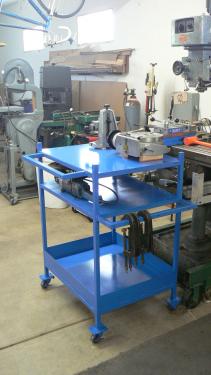
Today I created a mobile table from some scrap material I had in the shop. I had purchased a vice in September weighing 100#, a rotary table in May weighing 100# and I suddenly realized I need a way of moving these things about without a lot of heavy lifting. Here is a picture of the table I created, I also added a location for storage of my "C" clamps.

ml_woy, proud to be a member of MetalworkingFun since Jul 2012.
Posts: 1,827
Threads: 51
Joined: Apr 2012
Location: Oklahoma
(05-16-2013, 12:47 PM)DaveH Wrote: Neat little puller

DaveH
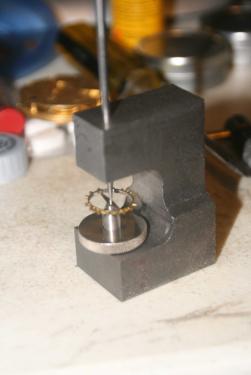
thanks had to have it to remove a wheel off of a clock, I ordered a tool to remove the roller table from the balance wheel in the pocket watches I been messing with but it wouldn't fit my staking tool so I had to make a frame to hold it in line with the punch.
heres a shot of it not pretty but it works and now more then I'll use it I think it will be fine.

dallen, proud to be a member of MetalworkingFun Forum since Apr 2012.
If life seems normal, your not going fast enough! 
Posts: 8,854
Threads: 318
Joined: Feb 2012
Location: Arizona/Minnesota
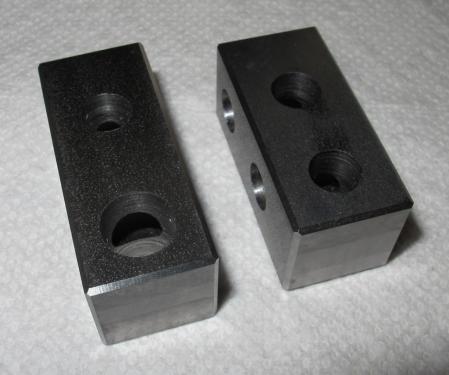
I finished up the blocks this evening for my milling vise work stop. Now on to the clamps.
Ed

Posts: 3,798
Threads: 184
Joined: Jun 2012
Location: Farmington Hills, Michigan
Wow, you guys had more fun, I just did some repair work. Nice job!
I finally got around to diagnosing the vibration and noise in the head on my mill. I thought it might have been a bearing in the motor or intermediate shaft, but as it turns out, it was just a worn bushing in one of the sheaves on the variable speed pulley, which made the pulley wobble. Luckily I caught it early and there was no damage to the sheave itself or the motor shaft. I ran out of time today, but I'll make a couple new bushings tomorrow, press them in and she should be good for another 30 years.
At least I got to try out my new bench.
Tom
![[Image: 001_20.JPG]](http://photos.imageevent.com/tomgriffin/generalstuff/large/001_20.JPG)
Posts: 2,685
Threads: 29
Joined: Feb 2012
Location: Nova Scotia, Canada
I figure I need to do the same sorta maintenance to my mill but being without it and probably needing it for the repairs scares me.
Glad you've got everything under control.
Busy Bee 12-36 lathe, Busy Bee Mill drill, Busy Bee 4x6 bandsaw, Homemade 9x17 bandsaw, Ad infinitum.
Posts: 3,798
Threads: 184
Joined: Jun 2012
Location: Farmington Hills, Michigan
Being without a mill is definitely a pain. I also need to make a new key for the pulley, but with the mill down I'll need to use the old one long enough to make a new one and then swap them out, unless I make one by hand. Not sure which would be the bigger pain.
Tom
Posts: 200
Threads: 4
Joined: Feb 2012
Location: Tyler, TX USA
That's what I don't like about the Reeves drive units. Once they get some wear on them, they sound awful, and if you don't get on it pretty quick, they'll self destruct.
Posts: 1,827
Threads: 51
Joined: Apr 2012
Location: Oklahoma
yesterday I watched Tornado's all day, the day before that I made the blue spring you see in the photo, for a clock movement that I acquired the other day.

its made from a short piece of band saw blade that I softened and then shaped and then heat treated it and boiled in bluing salts, its a little bit on the stiff side for what it has to do but it will work.
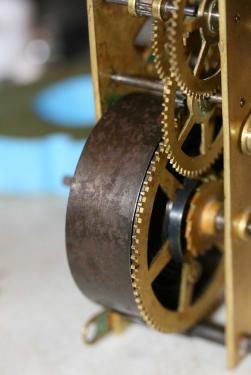
then last night while looking at the clock movement I noticed these cracks in the main spirng for the Chime side of the movement, the movement even thou its probably over a hundred years old has too much wrong with it to spend the money for a new mainspring, so its being delegated to the shelf as a learning tool so hopefully I won't mess up a good one when one shows up on the front porch.
Cracks in spring

dallen, proud to be a member of MetalworkingFun Forum since Apr 2012.
If life seems normal, your not going fast enough! 
Posts: 184
Threads: 21
Joined: Feb 2013
Location: north yorkshire n.e.england
(03-10-2013, 09:07 PM)TomG Wrote: (03-09-2013, 08:22 PM)TomG Wrote: I have a large quantity of small brass pins to make. They are 1/8" diameter, 3/8" long and have a 6º on them and a radius on the small end. Since I find making more than one or two of anything mind numbing, I decided that making a form tool would be worth my time. I came up with a simple design using two identical pieces of hardened O1 with the form cut in them and a half of a 3/16" cylindrical bore to align the two halves of the tool and mount them on a 3/16" dowel. The tool works like a pencil sharpener. It is held in the tailstock of the lathe and fed into a piece of 1/8" brass to cut the taper and radius, once the taper and radii are formed, the part is cut off with a parting tool. I figure that using the parting tool as a stop for the stock, and my fancy form tool, I should be able to crank out a finished pin every 15 seconds or so. I can't wait.
Tom
![[Image: 001_13.JPG]](http://photos.imageevent.com/tomgriffin/generalstuff/large/001_13.JPG)
![[Image: 002_11.JPG]](http://photos.imageevent.com/tomgriffin/generalstuff/large/002_11.JPG)
Here's a little video of the form tool in action.
gr8 idea Tom, definitely one to put in the back of my book for poss future use!!
Graham.
the artfull-codger, proud to be a member of MetalworkingFun Forum since Feb 2013.
Posts: 3,798
Threads: 184
Joined: Jun 2012
Location: Farmington Hills, Michigan
Thanks Graham. It's definitely a tool with a specific application, but I'm sure the concept could be applied to other parts, perhaps something with a stepped shaft. I haven't beat on it too much yet, but it seems to self center quite nicely and produces a good finish.
Tom
|


![[Image: 001_20.JPG]](http://photos.imageevent.com/tomgriffin/generalstuff/large/001_20.JPG)
![[Image: TomsTechLogo-Profile.png]](http://tomstechniques.com/wp-content/uploads/2013/11/TomsTechLogo-Profile.png)
![[Image: 001_13.JPG]](http://photos.imageevent.com/tomgriffin/generalstuff/large/001_13.JPG)
![[Image: 002_11.JPG]](http://photos.imageevent.com/tomgriffin/generalstuff/large/002_11.JPG)