Todays Project - What did you do today?
Ed beat me to it, I was going to ask if you did the stitches yourself, gotta watch out stuff like that hurts.
dallen, proud to be a member of MetalworkingFun Forum since Apr 2012.

If life seems normal, your not going fast enough! Tongue
Reply
Thanks given by:
(10-13-2012, 08:55 AM)EdK Wrote: Darren,

Did you put in the stitches? Smiley-signs107

Ed

Ed,
you beat me to that one. After all, this is the project sectionThumbsup

Dan
Collecting tools for 30 years.
Reply
Thanks given by:
(10-13-2012, 09:14 AM)DanH Wrote:
(10-13-2012, 08:55 AM)EdK Wrote: Darren,

Did you put in the stitches? Smiley-signs107

Ed

Ed,
you beat me to that one. After all, this is the project sectionThumbsup

Dan

And it's in Darren's area of expertise. Smile

Ed
Reply
Thanks given by:
I knew Darren didn't do the stitches, they'd have been a lot neater if he did. Heal Bro, heal.
Busy Bee 12-36 lathe, Busy Bee Mill drill, Busy Bee 4x6 bandsaw, Homemade 9x17 bandsaw, Ad infinitum.
Reply
Thanks given by:
Yeow, that's gonna leave a mark! Too bad it doesn't have more of a curve to it, you could tell everyone it was a shark attack.

I got nicked by a chain saw once but luckily it only got my jeans. It only takes a momentary lapse in concentration.

Tom
[Image: TomsTechLogo-Profile.png]
Reply
Thanks given by:
That looks pretty gross, thanks for sharing some gore with us! Thumbsup Should have just held it together and put some super glue in there! Big Grin
SnailPowered, proud to be a member of MetalworkingFun since Aug 2012.
Reply
Thanks given by:
My dad has an old Sherwood stereo receiver. The power switch quit working a few years back. Replacement parts are impossible to find, so I opened up the switch to see what was inside. Turns out theres a small plastic part, and it fractured. So, I made a replacement. Brass, because that's what I had on hand.

Pic shows new part and original. If you look closely, you can see where I glued it. Tried glue before, but it wouldn't hold.

[Image: Sherwoodfix.jpg]


Yes, it's ugly. It's uneven, and the slot still needs filed to fit. But it fixes a perfectly good stereo for my dad, and he is pleased.
Full of ideas, but slow to produce parts
Reply
Thanks given by:
Roger,
That's not ugly - it's beautiful Thumbsup
And best of all your Dad is happy ThumbsupThumbsupThumbsup
Smiley-eatdrink004
DaveH
Reply
Thanks given by:
Hey, if it works, that's all that counts. And it'll probably outlast him. Smiley-signs107

That's one of the nice things about owning these machines. Fix it rather than throw it out.

Ed
Reply
Thanks given by:
I've been running my old AC tractors without the massive oil bath air cleaner on the carb because it's impossible to troubleshoot little problems that crop up. Say it won't start or it dies, well you have to dismantle a big clumsy affair just to squirt a bit of gas into the carb or see if it's flooded.
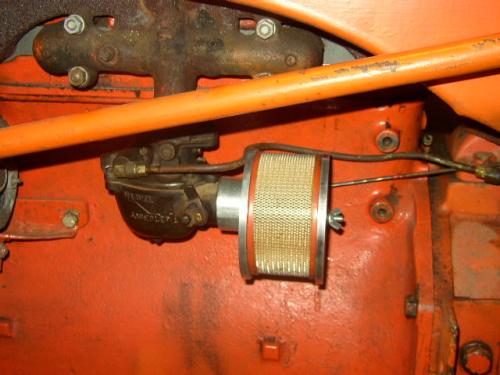
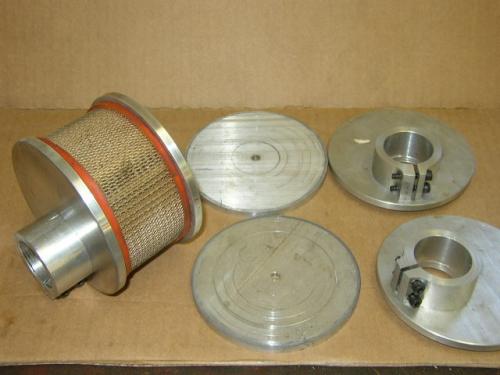
I decided to make a new set-up to accomodate a reasonable size Fram air cleaner.


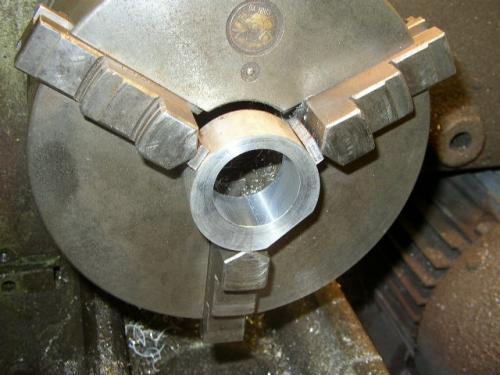
I started with some alu stock 2¼“ in dia. It had a 1” wide flat milled along it's length but for mt purpose that wasn't a problem.

Here I've offset mounted a piece of the stock that's been faced to length, this will be the clamp to the inlet of the carb.
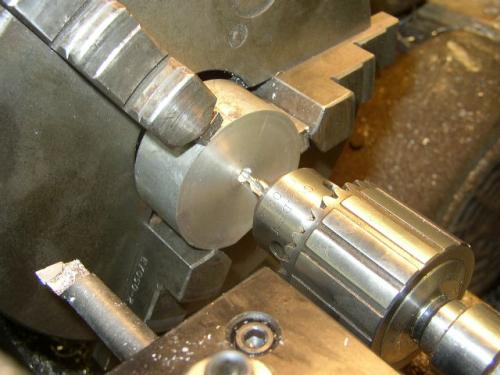


I sorta cheated by shimming two chuck jaws with some 3/16” flat it was spot on with the ctr. Punch mark I'd laid out (luck).
The flat is hidden by the tailstock chuck but it appears in following photos.
The boring bar is at the ready, I drilled a pilot hole thru then followed with the biggest drill I had because boring can be boring but drilling can be thrilling.
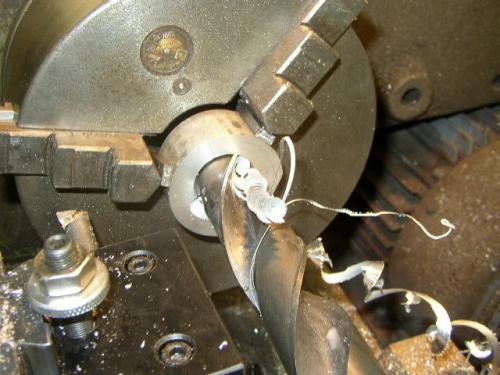
   

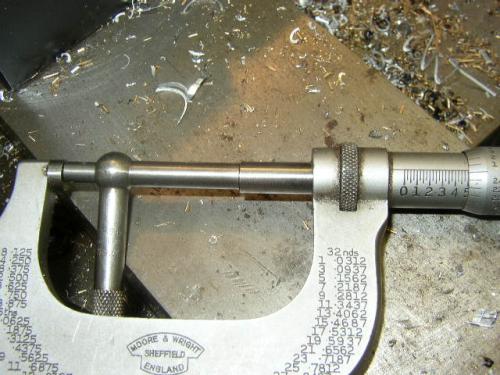
Here it is bored out to 1½” to fit the carb.


He telescoping guage and 2”mic say I'm pretty close.


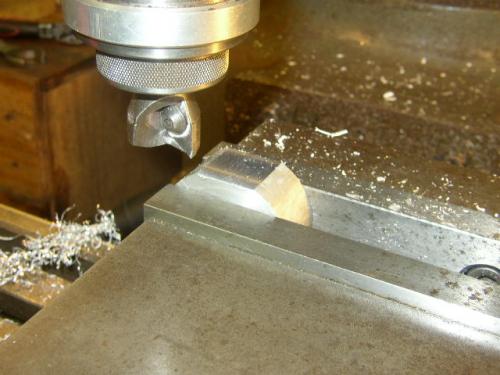
Here's where I mill the second 1” wide flat.


Now into the RT to finish the outside profile,
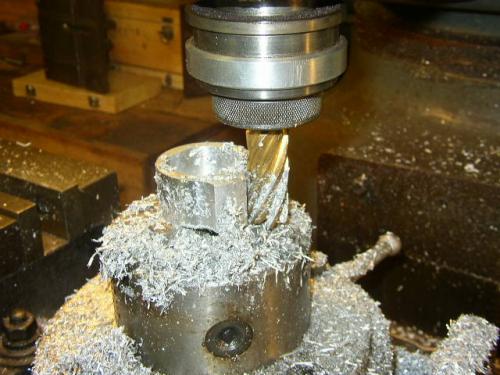


That done it's on to counterboring the clamp for the 2 hex socket screws to clamp the clamp.
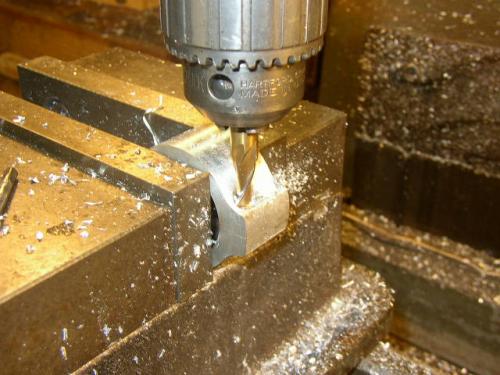
   

Now tap drill and clearance drill and tap.
   

Now slit the opening of the clamp and we're almost done.
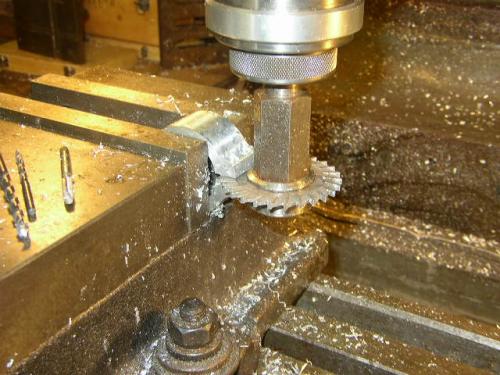
   

A little more drilling and tapping for the ¼” end plates, a little ¼” allthread rod, a washer and a wing nut and we're at the result shown in the first pic. A little triplication and all three tractors are covered (or will be).
   
Busy Bee 12-36 lathe, Busy Bee Mill drill, Busy Bee 4x6 bandsaw, Homemade 9x17 bandsaw, Ad infinitum.
Reply
Thanks given by:


Users browsing this thread: 134 Guest(s)