Posts: 3,003
Threads: 51
Joined: Apr 2012
Location: Ontario
My old Lincoln has that ramp up feature on the wire speed. If I remember correctly, the manual says it gives the wire time to heat up and start the puddle before pilling on the filler. I've tried turning it off, I get an ugly cold blob at the beginning of the weld with out it.
Greg
Free advice is worth exactly what you payed for it.
Greg
Posts: 4,493
Threads: 187
Joined: Feb 2012
Location: Missouri, USA
(04-13-2012, 07:19 AM)EdAK Wrote: I've never noticed that and the manual doesn't say anything about that feature. I'll have to watch for it the next time I fire up the welder.
Ed
You might not notice it at all if the wire speed is set at the lower end of the scale. If you crank it up to the upper end, you'll see the difference.
Willie
Posts: 4,683
Threads: 93
Joined: Feb 2012
Location: Perth, Australia
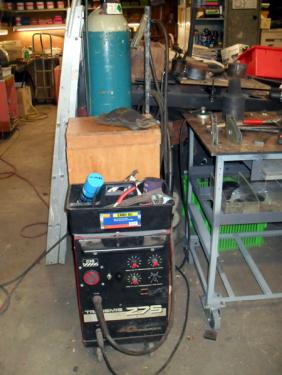
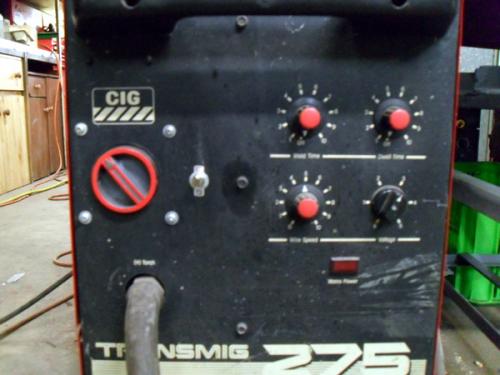
Thought I'd post a couple of pics of my old welder.


From Left to Right: The 3 phase on/off switch and wire spool motor on/off switches I installed. (top row) weld time and dwell time, (bottom row) wire speed and voltage.
Hunting American dentists since 2015.
Posts: 8,888
Threads: 320
Joined: Feb 2012
Location: Arizona/Minnesota
Mayhem,
That welder looks like a tank. I'll bet it weighs a ton.
Ed
Posts: 4,683
Threads: 93
Joined: Feb 2012
Location: Perth, Australia
It is a two person lift!
Hunting American dentists since 2015.
Posts: 8,888
Threads: 320
Joined: Feb 2012
Location: Arizona/Minnesota
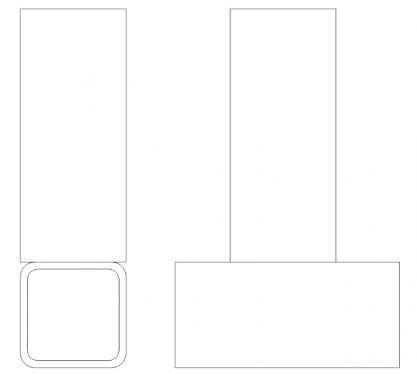
Question. How do I T-weld square tubing? With the radius' on the corners, there is a gap where there is no metal to metal contact so I can see easily blowing through. The only way I can see closing that gap is to form the end of the tubing to match the radius' and that seems like a whole lot of work. This is 1 1/4" 14 gauge (.083") square tubing. See attached sketch.
Ed

Posts: 1,459
Threads: 159
Joined: Feb 2012
Location: Northern England
Hi
Ed
Box section is easy to weld the gap will fill in no problem
What you need is someone to help you set up your welder and give you a few pointers
Once you get set up you will be suprised how easy it is to get good results.
You can tell when a MIG is running well by the sound it makes
It should sound like bacon crackling in a frying pan.
Get some scrap bits of box section start welding them and adjust the power and wire feed rate as you weld
If it spits and tries to push you away you need more power less wire
If it blows holes you need less power more wire
Once you get a feel for it you will be fine
Posts: 8,888
Threads: 320
Joined: Feb 2012
Location: Arizona/Minnesota
Thanks John. I guess I just need more "stick time" to get the process down. I think it's finally spring here in Minnesota, lilacs are blooming, so welding weather should be here for a few months now.

Ed
Posts: 1,459
Threads: 159
Joined: Feb 2012
Location: Northern England
Once you get a "feel for what the welder is telling you) it will all fall in to place
John
Posts: 8,888
Threads: 320
Joined: Feb 2012
Location: Arizona/Minnesota
John,
For the 14 gauge tubing, (.083") should I be using the .025" or .030" wire? Or maybe it doesn't matter and is more dependent on the wire feed and power settings.
Ed


