Todays Project - What did you do today?
Glad to hear you are OK. Nice job on the new handle. I too replaced the handle on mine. Not because it broke but because it looked cheap and nasty.

Any job that is worth your time and effort is one worth sharing, not matter whether you think it is exciting or not. They don't need to be pretty either. I've posted some fixes and "special" tools that I have made that are plain butt ugly but did the job. So post away!
Hunting American dentists since 2015.
Reply
Thanks given by:
casted another ingot mold today cause I didn't like one spot on the first one
   
dallen, proud to be a member of MetalworkingFun Forum since Apr 2012.

If life seems normal, your not going fast enough! Tongue
Reply
Thanks given by:
Got as far as I could soldering up two MachTach kits. I'm missing a few parts so an order to Digi-Key is in the works.

Ed

   
Reply
Thanks given by:
So just about to get another thing off the metalworking bucket list, metalspinning! Who knew there is so much wood working / turning was involved???
I want to make some hubcaps for some old pedal cars, no they are not being reproduced, (Pierre Gui & Eureka)
So I got the lathe going, so been fighting some sore shoulders, but though how much trouble can lathe work be?

.jpg   20150730_085326.jpg (Size: 33.18 KB / Downloads: 201)
So this is the hubcap on the form


.jpg   20150731_123738.jpg (Size: 39.5 KB / Downloads: 201)
a better look at the hubcap.
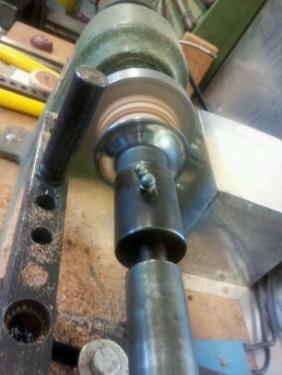
   

so I had a 3-3.5" round pc of 3003 .063 h14 aluminum that I had cut from left overs testing the 299 Pexto circle cutter.
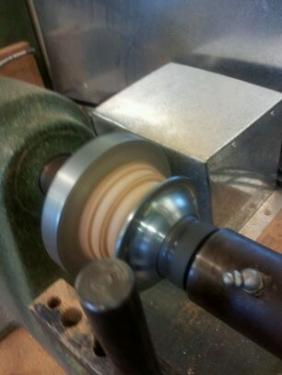
   

You learn quick!  The 1st tool was not as polished as it should have been, a little lube helps too!
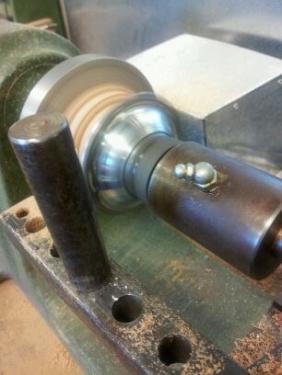
   

a couple of more sweeps back and forth, "use" your body not your arms!  even with a small set up like this it will wear you out!
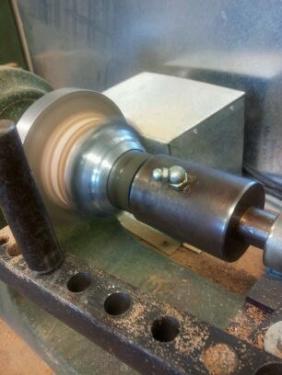
   

tried to take some progress pics, not know how fast it would spin up so just a couple of passes, another pic.
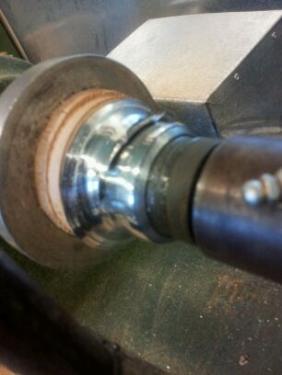
   

yep that is a fubar!  looks like I went to thin! 


.jpg   20150731_132601.jpg (Size: 35.68 KB / Downloads: 190)

well this is what I had left after trimming, it was a learning experience for sure. 


.jpg   20150801_112413.jpg (Size: 39.5 KB / Downloads: 190)

so working on spin form #2 for the other style hubcap 


.jpg   20150801_115132.jpg (Size: 35.92 KB / Downloads: 191)

 the stick rule is to give you an idea on the size of the work


.jpg   20150801_120244.jpg (Size: 41.41 KB / Downloads: 194)

these hubcaps are very rough so the spin form became a hammer for taking out some of the dings & dents

Lathe is Karle Spin Shop Lathe
oldgoaly, proud to be a member of MetalworkingFun Forum since Jun 2013.
Reply
Thanks given by:
I've also been fascinated by metal spinning.

I just saw part of an interesting documentary on both the National Guitar company, which uses metal spinning to produce the cones in resonator guitars, as well as some of the artists who play National guitars. It's called "Resonate". It's on YouTube.
Reply
Thanks given by:
Again needed a collet stop, so finally made one. One of those things you should buy but never bother till you need it.

[Image: IMG_1817.jpg]
Free advice is worth exactly what you payed for it.
Greg
Reply
Thanks given by:
Some of you may recall a post earlier this year about my Mum's 1.9TDI Astra shredding its timing belt and introducing the valves to the pistons.  Well it has been a long and often complicated process, as there are virtually no major parts available here (Holden imported about 2000 of this model into Australia), some parts sourced overseas had slightly different components and one part I had to make.  I've also been away with work at various times. 

Two weeks ago I was torquing up the camshaft bearing cap bolts and one chewed up the thread in the head.  These threads are M7x1 and none of the auto parts stores stocked Helicoil kits in that size.  One said they could get them in but then didn't.  Ordered last week from a different supplier and got them yesterday.  I had considered simply going to a M8x1.25 but the hollow locating dowels that the bolts pass through are too small.  In fact, they were too small for the drill and tap needed for the helicoil, so I had to figure out how to get them out.  Fortunately, I have the scrap head that came off the car.  I discovered quickly that these were rather fragile and pliers wouldn't work.


I decided that I could lightly tap them and then use a slide hammer to pop them out.  Trouble is that my slide hammer was at home.  I did have another at my Mum's but the end was missing (I've been meaning to make one for ages).  The thread is 1/2-13 and all my US taps are also at my home.  So I found some scrap that suited and welded a 1/2-13 nut to one end.  The other end already had a hole in it, which was suitable for a M12 thread.  I had some M12x1.75 all thread on hand so I tapped it to suit.  I then turned down a section of thread and (using a die) I cut a M8x1.25 thread.  It doesn't look too pretty but it worked a tread.


Next I made a drill guide, which was interesting to make as the inside diameter is 9/32" (0.218) and the outside is just a touch over 7mm (0.276).


Sorry for the crap pics, I was using my phone.  The good news is that the bolt now torques down, so that job is finally done.  Now I have to remove the new hall effect sensor for the cam from the bracket that it is mounted on, so I can put it on the bracket that came off the car...
Hunting American dentists since 2015.
Reply
Thanks given by:
(08-01-2015, 04:12 PM)EdK Wrote: Got as far as I could soldering up two MachTach kits. I'm missing a few parts so an order to Digi-Key is in the works.

Ed

Just curious ... what parts were missing?

Arvid
Reply
Thanks given by:
(08-02-2015, 08:15 AM)arvidj Wrote:
(08-01-2015, 04:12 PM)EdK Wrote: Got as far as I could soldering up two MachTach kits. I'm missing a few parts so an order to Digi-Key is in the works.

Ed

Just curious ... what parts were missing?

Arvid

Arvid,

I had bought two kits years ago but never got around to building them. Since then the design has gone through a couple of revisions/improvements so I ordered new, blank PC boards and the new parts that were different from the older kit. I forgot I had robbed some parts from the old kits to use for other projects during the years thus the missing parts. Mostly resistors and capacitors.

Ed
Reply
Thanks given by: arvidj
My old ATV seams to have fallen apart.
[Image: IMG_1818.jpg]

Decided to tear it down and give it a bit of a restore. 24 years of experience are showing on it. Will clean it up, repaint the racks and some of the frame and see if we can buff some colour back into the plastic fenders.
Free advice is worth exactly what you payed for it.
Greg
Reply
Thanks given by:


Users browsing this thread: 83 Guest(s)