Posts: 2,685
Threads: 29
Joined: Feb 2012
Location: Nova Scotia, Canada
03-27-2013, 06:40 PM
(This post was last modified: 03-27-2013, 06:41 PM by stevec.)
DaveH, From what I've been led to understand the first stage is higher volume and lower pressure, when the pusher brings the log section up to the splitting wedge the resistance causes the pump to go to "second" stage of higher pressure and less volume.
The idea is to reduce the cycle times because stroke is usually longer than normally required.
My splitter(s) have 24" stroke but most of my "junks" (that's what they call the cut to length logs here) are 16" so except for some longer pieces there's about 8" of useless travel.
A 4" dia. cylinder represents 12.67 sq. inches, if the pump produces 2,000 psi at high pressure that'd be 25,340 pounds or 12.67 tons of force.
I'll have to check the specs of my pump but that'll be pretty close. (1,500 psi would give 9.5 tons).
Busy Bee 12-36 lathe, Busy Bee Mill drill, Busy Bee 4x6 bandsaw, Homemade 9x17 bandsaw, Ad infinitum.
Posts: 4,513
Threads: 139
Joined: Feb 2012
Location: Kempton Park. South Africa
Thanks Steve,
My hydraulics is some what poor. 
So are cylinders rated to a maximum psi ?

DaveH
Posts: 2,685
Threads: 29
Joined: Feb 2012
Location: Nova Scotia, Canada
DaveH, Yes, most of today's "run of the mill" cylinders will handle the pressures of today's "run of the mill" pump pressures. My old Allis-Chalmers tractors however, were equipped with cam operated piston pumps of low volume high pressure (some above 3,000 psi).
The cylinders were single acting and actually were rams, in that they had no piston, per se. They worked on the displacement principal. The rods (rams) were pretty close to the ID of the cylinders (they look really skinny) and were just displaced outward by the fluid under high pressure. Allis only had to seal the ram end of the cylinder, no piston seals to wear out and leak.
Busy Bee 12-36 lathe, Busy Bee Mill drill, Busy Bee 4x6 bandsaw, Homemade 9x17 bandsaw, Ad infinitum.
Posts: 2,685
Threads: 29
Joined: Feb 2012
Location: Nova Scotia, Canada
A little more progress on the splitter, I machined the "cutting" edge on the wedge and beveled the leading edges of the wedge "backer"
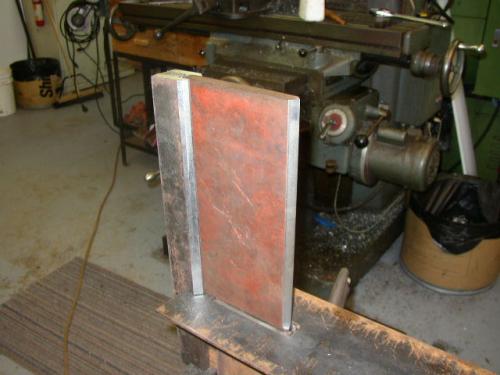
I should have made the "backer" out of one 1¾" or 2" thick piece but I had no inventory so I welded it up from a 5/8"x 15/16" and 2 2x1/4" pieces. here's a pic of the wavy weld.
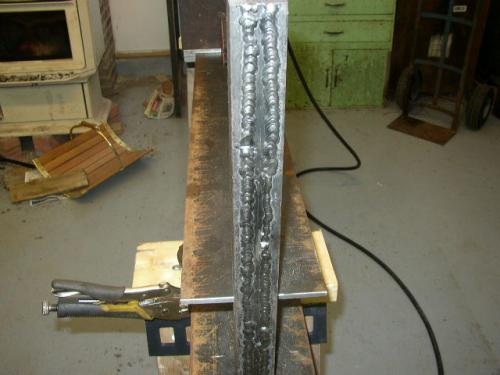
I also welded the pieces on the inside of the groove into which the edge slides but didn't take a pic.
I will have a bit of a log "spreader" with the wedge backer but by the time the split log gets there it should be spread enough to not even touch the backer sides.
Here's a pic of the 45° tool I used to put the edge on the wedge and the backer side plates. In this pic I'm chamfering the sides of the wedge socket parts so I can weld them together and dress them to fit the H Beam slot without grinding away all the bead.
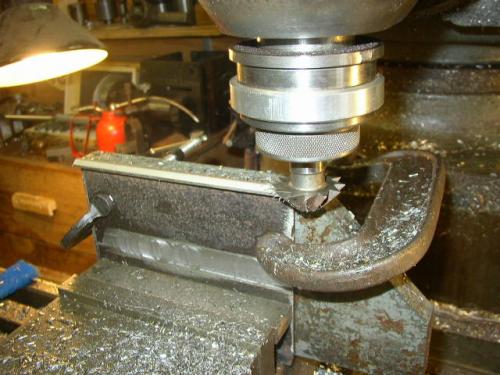
I'm getting close to a major "weld-a-thon" to weld all these parts together, today provided a great afternoon for opening the garage doors and making sparks and smoke without freezing my butt.
It's 9°C-48°F in the shade and 22°C-77°F in the sun.
There'll be more to come, I hope.
Busy Bee 12-36 lathe, Busy Bee Mill drill, Busy Bee 4x6 bandsaw, Homemade 9x17 bandsaw, Ad infinitum.
Posts: 4,683
Threads: 93
Joined: Feb 2012
Location: Perth, Australia
Looking good Steve. I'm going to get around to building one of these one day...
Hunting American dentists since 2015.
Posts: 2,685
Threads: 29
Joined: Feb 2012
Location: Nova Scotia, Canada
04-03-2013, 01:32 PM
(This post was last modified: 04-03-2013, 01:41 PM by stevec.)
I had most of this post done when I foolishly tried "preview post" which I now remember doesn't give you the pics.
What kinda preview is that Ed? 
Next step was to hit the browser "back" button and POOF no trace of the laboriously constructed post. 
OK, take 2.
Today's progress continued at my normal snail's pace, but I managed to fab. two parts for the log lifter.
Considerable fussing about (no, let's call it design) went in to these parts .
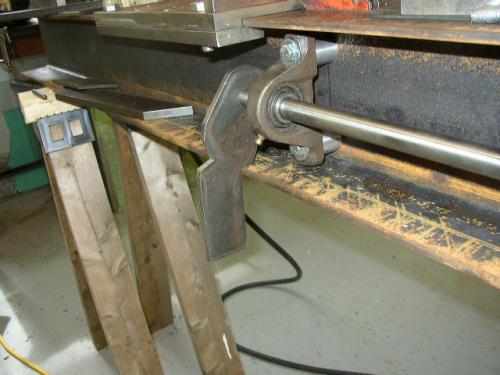
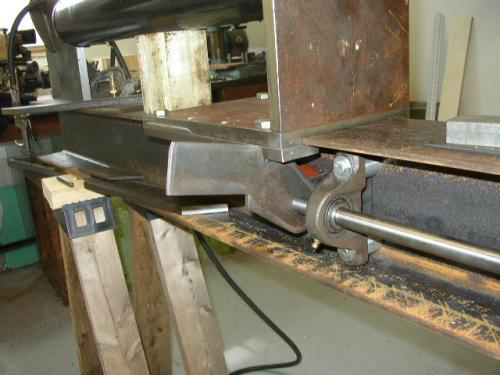
The idea is that the lifter table be close to vertical when down and slightly inclined when up.
The manufacture of these parts started with a cardboard pattern, much masking tape modification and then 2 pieces of 3" X ¼" HR steel, drilled for the ¾" shaft rough cut on my trusty 4 X 6" bandsaw which now lives in the vertical position.
Here's my "not recommended method for cleaning up bandsawn radii.
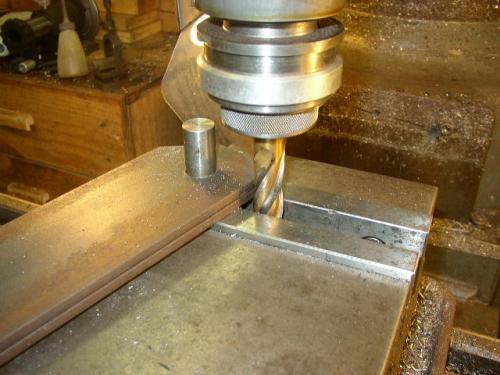
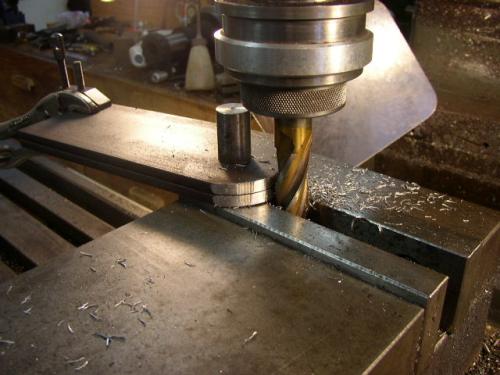
Don't even consider "climb milling" in this manually fed operation. It could lead to another "operation" in the hospital.
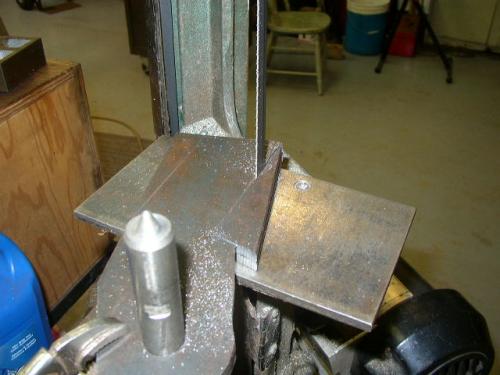
Clean up of straight edges is much safer.
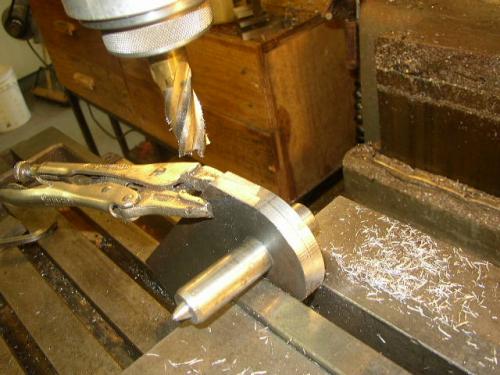
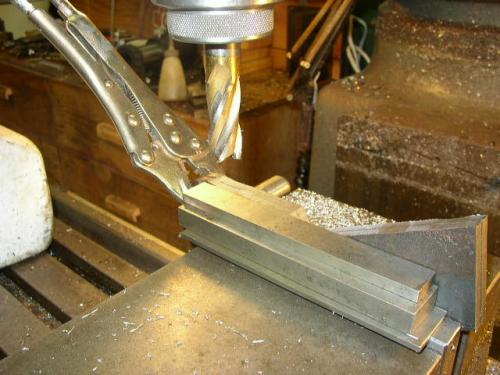
I often line up the edge to be cleaned up by stacking parallels on the vice jaw to give a pretty good alignment. At least good enough for my
"low precision" work.
Busy Bee 12-36 lathe, Busy Bee Mill drill, Busy Bee 4x6 bandsaw, Homemade 9x17 bandsaw, Ad infinitum.
Posts: 1,459
Threads: 159
Joined: Feb 2012
Location: Northern England
Looking good Steve
Nice and meaty
I am still using a maul
Very well photographed & presented   
John
Posts: 8,863
Threads: 319
Joined: Feb 2012
Location: Arizona/Minnesota
(04-03-2013, 01:32 PM)stevec Wrote: I had most of this post done when I foolishly tried "preview post" which I now remember doesn't give you the pics.
What kinda preview is that Ed? 
Steve,
You'll have to direct your question to those that wrote the forum software.
http://www.mybb.com/
There was a discussion about this subject in the support forum and the gist of the problem was that since the picture doesn't actually reside in the database until you submit your post, there is no way to display it in the preview. This forum software is not the only software with that "limitation". Most others behave the same. There are a few that do display the pictures in the preview mode so it's certainly not impossible to do. If you link to a picture rather than attach it to the post, then it does show up in the preview mode. I seldom do that though.
I'll refund your money Steve. Sorry for the inconvenience. 
Ed
Posts: 1,459
Threads: 159
Joined: Feb 2012
Location: Northern England
Posts: 3,798
Threads: 184
Joined: Jun 2012
Location: Farmington Hills, Michigan
Good progress Steve. I just discovered this thread (not sure how I missed it) so I'll need to go back and read it all in detail.
If you want to preview your post with pics, just post them off site someplace like Flickr or Photobucket (I use ImageEvent) and link to them in your post. Like this: [IMG]your image address[/IMG]. Then you can place them wherever you want and view the result before posting and making a fool of yourself. 
Tom
|


![[Image: TomsTechLogo-Profile.png]](http://tomstechniques.com/wp-content/uploads/2013/11/TomsTechLogo-Profile.png)