03-09-2018, 01:45 AM
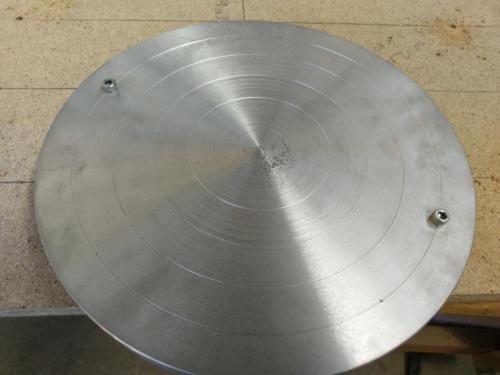
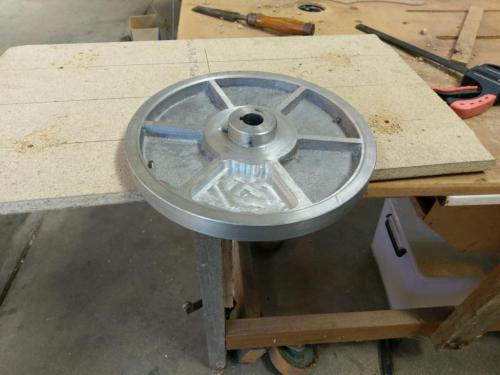
There was a fair bit of machining to do on the throwing-head casting, I started by chucking it by the outer rim to machine the underside on the lathe, made the central spigot round and square (confusing?) and bored the blind centre bore to take the 25mm shaft. I made the outer rim thicker than the spoked section so that water coming over the sides would not run into the centre and down the axle. I left enough rim clear of the chuck jaws so I could turn a face to indicate off when I flipped it to face the top. I turned it over and chucked it by the centre spigot so I could turn the outer rim as well as facing the throwing surface. With the piece held by the spigot, it rang like a bell while I was facing the outer section, the resulting chatter is visible in the photo with the bevel gears in the post above. Yesterday I realised I could now grip it by the outer rim again, took another skim across the face and now got a nice surface. The centre of the casting is a bit porous.

The two capscrews are to act as locating pins for 'bats', apparently all the cool kids in pottery use these- a 'bat' is a disc of plastic or masonite that is placed on the throwing head, it has holes to engage these pins, the pot is made on the bat and the bat is lifted off the throwing head along with the pot, it can be put back on for later reworking. The things you learn. 10" pin spacing is apparently a standard size for bought bats.
The photo of the casting in my earlier post, with the casting in the sand, shows the part of the mold that collapsed where the excess needed to be machined out. I planned to mount the thing on my RT so I could follow the radius as well as the spokes. Went to the trouble of mounting the RT on the mill, put the disc on top and realised the disc is the same size as the RT and the RT slots don't go all the way to the rim, the centre hole is blind, in short I had no way of holding the thing down to the RT. I dismounted the RT and clamped the disc to the table and did an ugly job of gouging out the extra material, really this is just to avoid any gross imbalance.

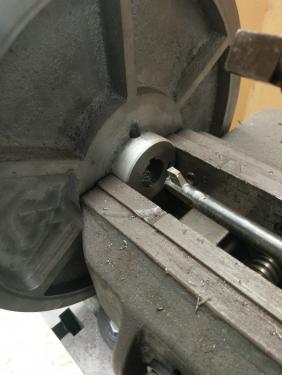
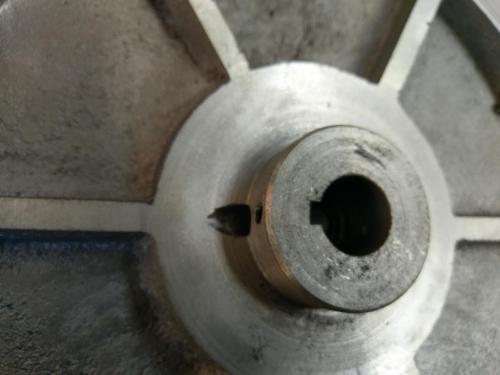
Took me a while to figure out how I was going to cut a keyway in the blind bore of the throwing head, I welded a boring bar to a piece of tool steel long enough to allow the nose of the shaper ram to clear the rim while the tool went into the bore. Drilled a hole (random drill it chosen- about 3/8) at an angle to intersect the bore right at the end, to give the slotting tool somewhere to finish the stroke. Clamped the spigot in the shaper vice, with an improvised jack in the other end of the jaw. All this setup, along with grinding the 1/4' slotting tool all took about an hour and a half. The cut took less than 5 minutes. Gotta love the shaper.


The two capscrews are to act as locating pins for 'bats', apparently all the cool kids in pottery use these- a 'bat' is a disc of plastic or masonite that is placed on the throwing head, it has holes to engage these pins, the pot is made on the bat and the bat is lifted off the throwing head along with the pot, it can be put back on for later reworking. The things you learn. 10" pin spacing is apparently a standard size for bought bats.
The photo of the casting in my earlier post, with the casting in the sand, shows the part of the mold that collapsed where the excess needed to be machined out. I planned to mount the thing on my RT so I could follow the radius as well as the spokes. Went to the trouble of mounting the RT on the mill, put the disc on top and realised the disc is the same size as the RT and the RT slots don't go all the way to the rim, the centre hole is blind, in short I had no way of holding the thing down to the RT. I dismounted the RT and clamped the disc to the table and did an ugly job of gouging out the extra material, really this is just to avoid any gross imbalance.
Took me a while to figure out how I was going to cut a keyway in the blind bore of the throwing head, I welded a boring bar to a piece of tool steel long enough to allow the nose of the shaper ram to clear the rim while the tool went into the bore. Drilled a hole (random drill it chosen- about 3/8) at an angle to intersect the bore right at the end, to give the slotting tool somewhere to finish the stroke. Clamped the spigot in the shaper vice, with an improvised jack in the other end of the jaw. All this setup, along with grinding the 1/4' slotting tool all took about an hour and a half. The cut took less than 5 minutes. Gotta love the shaper.
Lathe (n); a machine tool used in the production of milling machine components.
Milling Machine (n); a machine tool used in the production of lathe components.
Milling Machine (n); a machine tool used in the production of lathe components.


![[Image: TomsTechLogo-Profile.png]](http://tomstechniques.com/wp-content/uploads/2013/11/TomsTechLogo-Profile.png)