The following illustrates the use of a couple of wood-working router cutters to make a simple machine tool handle. I’d used router cutters previously to edge aluminum using a hand-held or table-mounted router and also in a vertical mill. But not only was this my first trial on steel but also the first use as a lathe cutting tool.
Note that the router cutters were used for decorative purposes in this application. The old timers of the last century who built machine tools that we still admire, made a practice of combining a graceful appearance with function and that seems to me a good idea.
This particular project would have been perfectly functional as a straight handle but since I had the time, there’s no reason not to make it attractive, right ?
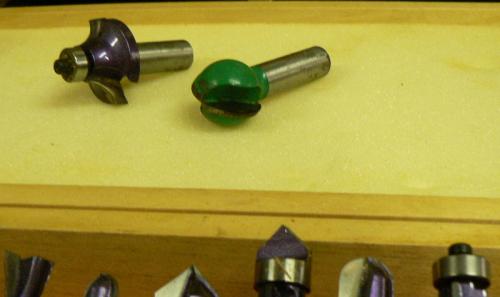
Two different router cutters were used, a 1/2 inch radius corner rounding cutter and a one inch ball cutter; the workpiece was 1 inch diameter cold rolled steel.
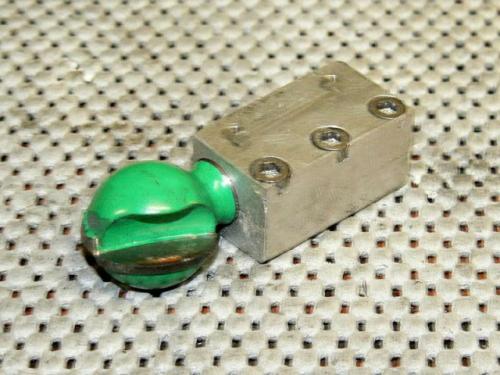
The cutters were held in a decades-old "temporary" (that’s what I thought at the time) boring tool holder. The holder consists of an aluminum partly-split block, reamed for ½ inch diameter shanks and with a few clamping screws.
Like most modern router cutters, the two that I used were brazed carbide with ½ inch shanks. The 1 inch steel workpiece was turned at a spindle speed around 500 RPM. This is very slow for carbide cutters but the heavy plunging cuts were virtually free of chatter at that speed despite being worked in a small Emco 8 x 18 lathe.
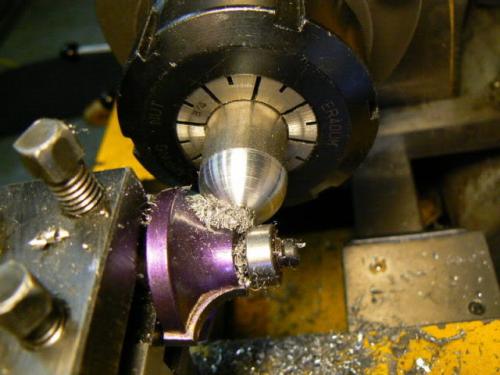
The first operation shows the workpiece being radiused .by the corner rounding cutter held in the aluminum split block which in turn was secured in a 4-way tool post. (The four way tool post was and is the normal tool holding configuration for the small lathe.)
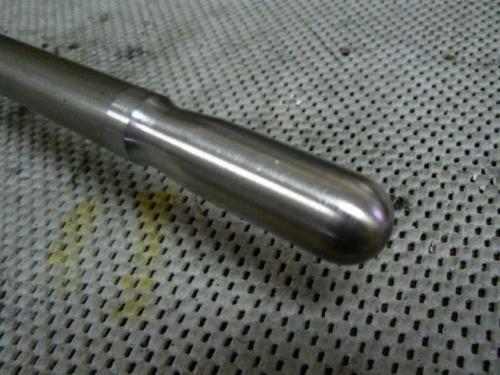
The finish cut was made by hand-rotating the spindle, shaving just a few thousandths of an inch off the work as can be seen below.
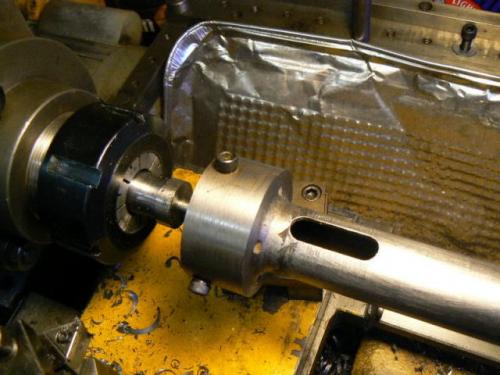
This is a photo of the old aluminum boring tool holder with the one inch diameter ball cutter installed. We probably don't think of aluminum as a first choice for a tool holder but in this case there is an advantage because dry steel on dry aluminum has a high friction coefficient.
That is desirable because the shape of router cutters makes them susceptible to slipping and rotating under the heavy cutting pressure of the forming operation. (If it was necessary to further increase the friction, some resin (violin resin from the music store) could be applied to the shank of the cutter.)
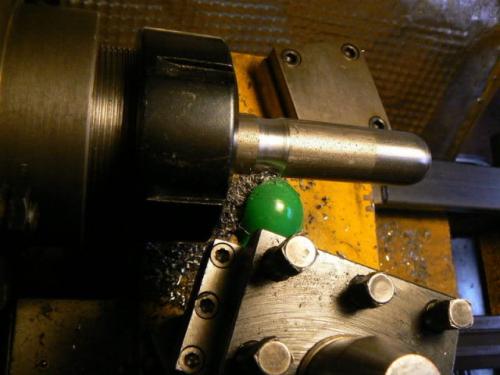
The ball router cutter is forming a wide, shallow groove into the steel rod in the following photo. Although the operation was no problem, it may have been better to have configured the cutter sort of like a boring bar but angling the cutter about thirty degrees from being parallel to the work. This would have engaged the sharper edge of the cutter rather than the tip, which doesn't cut well. I hope this makes sense -
After plunging the groove, a slight taper was turned on the lower part of the handle, using the compound slide.
The contoured part of the handle is ready for parting off. Note that the handle is not tapered over the entire length, although it would have been more attractive I think. It has been left at full diameter for about half the length. This is so that the part can be reversed in the collet and still held securely. (Obviously if the part was tapered the entire length, it could not be gripped securely by a straight collet.)
I performed all of these operations dry and the finish may have been nicer, consuming less time, using coolant. The part was sanded a bit in the lathe followed by some coarse steel wool.
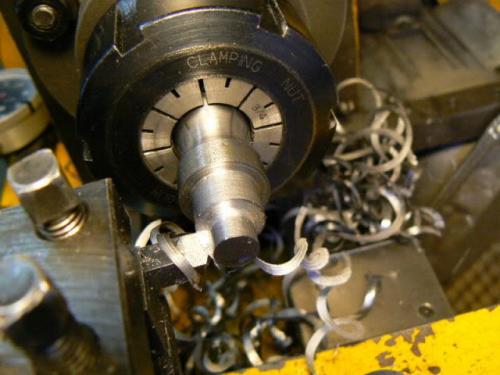
After parting, the work was reversed in the collet for the two remaining steps. Turning to .246 diameter (near the lower limit of 1/4-20UNC-2A major diameter) lessened the torque required for threading:
 [
[
Producing the threads with a shop-made chasing head:
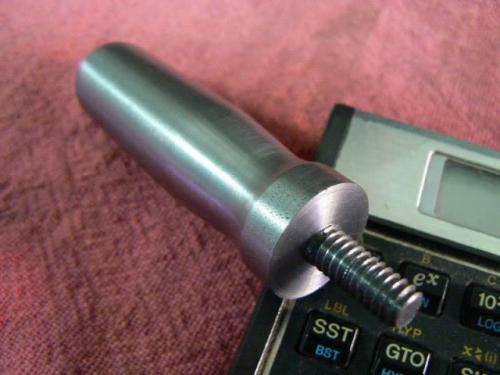
Done. Start to finish took less than fifteen minutes. This project was nothing special, it was mainly to determine if wood-working router cutters could be used effectively in the lathe. I rate it as a successful experiment , LOL -
Note that the router cutters were used for decorative purposes in this application. The old timers of the last century who built machine tools that we still admire, made a practice of combining a graceful appearance with function and that seems to me a good idea.
This particular project would have been perfectly functional as a straight handle but since I had the time, there’s no reason not to make it attractive, right ?
Two different router cutters were used, a 1/2 inch radius corner rounding cutter and a one inch ball cutter; the workpiece was 1 inch diameter cold rolled steel.
The cutters were held in a decades-old "temporary" (that’s what I thought at the time) boring tool holder. The holder consists of an aluminum partly-split block, reamed for ½ inch diameter shanks and with a few clamping screws.
Like most modern router cutters, the two that I used were brazed carbide with ½ inch shanks. The 1 inch steel workpiece was turned at a spindle speed around 500 RPM. This is very slow for carbide cutters but the heavy plunging cuts were virtually free of chatter at that speed despite being worked in a small Emco 8 x 18 lathe.
The first operation shows the workpiece being radiused .by the corner rounding cutter held in the aluminum split block which in turn was secured in a 4-way tool post. (The four way tool post was and is the normal tool holding configuration for the small lathe.)
The finish cut was made by hand-rotating the spindle, shaving just a few thousandths of an inch off the work as can be seen below.
This is a photo of the old aluminum boring tool holder with the one inch diameter ball cutter installed. We probably don't think of aluminum as a first choice for a tool holder but in this case there is an advantage because dry steel on dry aluminum has a high friction coefficient.
That is desirable because the shape of router cutters makes them susceptible to slipping and rotating under the heavy cutting pressure of the forming operation. (If it was necessary to further increase the friction, some resin (violin resin from the music store) could be applied to the shank of the cutter.)
The ball router cutter is forming a wide, shallow groove into the steel rod in the following photo. Although the operation was no problem, it may have been better to have configured the cutter sort of like a boring bar but angling the cutter about thirty degrees from being parallel to the work. This would have engaged the sharper edge of the cutter rather than the tip, which doesn't cut well. I hope this makes sense -
After plunging the groove, a slight taper was turned on the lower part of the handle, using the compound slide.
The contoured part of the handle is ready for parting off. Note that the handle is not tapered over the entire length, although it would have been more attractive I think. It has been left at full diameter for about half the length. This is so that the part can be reversed in the collet and still held securely. (Obviously if the part was tapered the entire length, it could not be gripped securely by a straight collet.)
I performed all of these operations dry and the finish may have been nicer, consuming less time, using coolant. The part was sanded a bit in the lathe followed by some coarse steel wool.
After parting, the work was reversed in the collet for the two remaining steps. Turning to .246 diameter (near the lower limit of 1/4-20UNC-2A major diameter) lessened the torque required for threading:
Producing the threads with a shop-made chasing head:
Done. Start to finish took less than fifteen minutes. This project was nothing special, it was mainly to determine if wood-working router cutters could be used effectively in the lathe. I rate it as a successful experiment , LOL -


