08-21-2017, 07:05 PM
(Continued From Part 1)
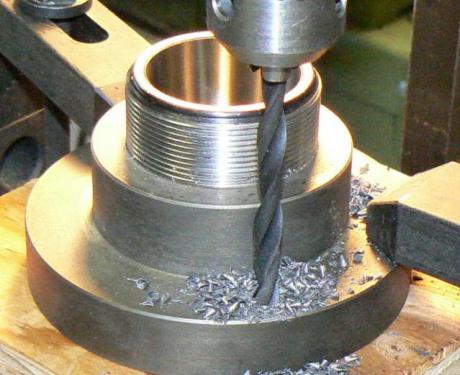
Drilling and tapping the three mounting holes that attach the assembly to the lathe spindle. No digital readout on the mill so “X” and “Y” dimensions were calculated from the required angles and distances to the centerline of the collet holder.
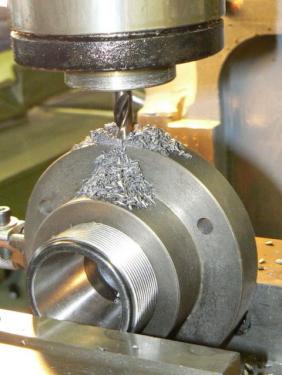
The work was removed from the table then clamped upright in the mill vise. I drilled three holes around the circumference for a “tommy bar” to be used for gripping the backplate and preventing rotation while tightening the collet.)
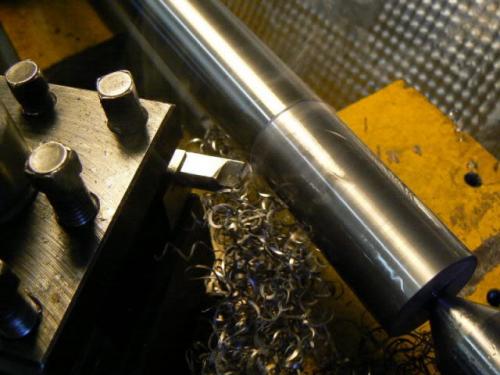
A length of one inch ground shaft was set up between lathe centers and turned for about four inches to 15/16 diameter at the tailstock end of the lathe. The shaft now becomes a mandrel that is concentric to the lathe spindle axis and will be used for completing some of the remaining work.
Note: Not only was working at the tailstock end of the lathe convenient, but the ways near the tailstock are almost always less worn than at any other location and the work will likely be more accurate.
Removing the mandrel from centers and with a 15/16 collet installed in the ER-40 holder, the collet assembly was slipped onto the turned part of the mandrel and the collet securely tightened.
Because the mandrel was on centers, there was no problem with losing concentricity when removing and re-installing it between centers.
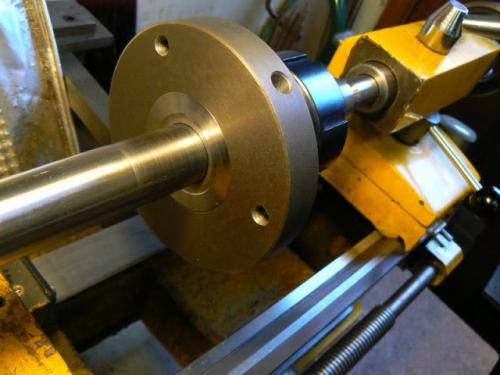
The spindle registration diameter was bored but the area closest to the mandrel had to be left unfinished because the cutting tool (which was in a four way tool post) couldn’t approach the dead center.
An Armstrong tool holder would have worked perfectly in this situation but I didn’t have one to fit this small machine. Probably some ingenious use of a boring tool would also have been suitable but there was a convenient workaround anyway.
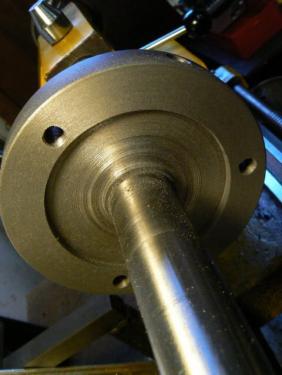
I chucked a short piece of one inch steel rod in the three-jaw and turned it to 15/16 diameter. The collet assembly was slipped over the turned diameter, tightened and the area left unfinished, from the previous operation, was faced slightly deeper.
No need for a pretty finish here so a fairly coarse cross-feed was used:
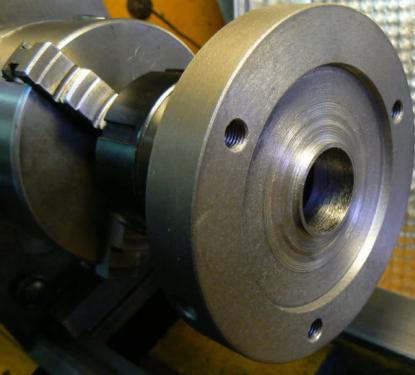
The completed part:
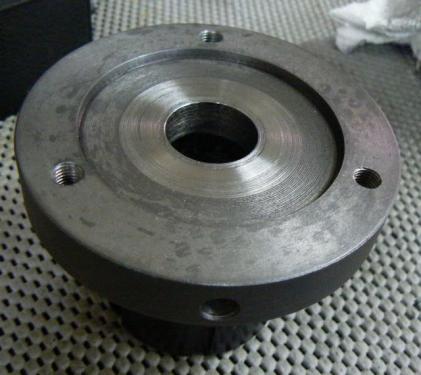
ER-40 collet chuck mounted to spindle:
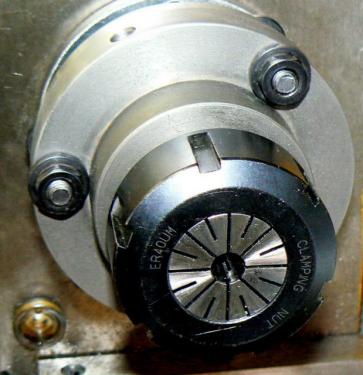
Runout less than .001 measured three inches from the collet face. Good enough for my needs.
The goals of this project: To equip the small lathe with collets while a four jaw chuck will be more or less permanently installed on the larger lathe. This all happened about four years ago and to date, has been successful.
Having said that, when this topic was posted originally on another forum, a common sense response let the air out of my tires !
The responder wondered why, instead of taking the pains to maintain concentricity, I did not simply allow a certain amount of movement so that I could then dial it into alignment with a bit of careful tapping ?

As Tony Soprano would have said, "Whaddayagonnado ?"
Drilling and tapping the three mounting holes that attach the assembly to the lathe spindle. No digital readout on the mill so “X” and “Y” dimensions were calculated from the required angles and distances to the centerline of the collet holder.
The work was removed from the table then clamped upright in the mill vise. I drilled three holes around the circumference for a “tommy bar” to be used for gripping the backplate and preventing rotation while tightening the collet.)
A length of one inch ground shaft was set up between lathe centers and turned for about four inches to 15/16 diameter at the tailstock end of the lathe. The shaft now becomes a mandrel that is concentric to the lathe spindle axis and will be used for completing some of the remaining work.
Note: Not only was working at the tailstock end of the lathe convenient, but the ways near the tailstock are almost always less worn than at any other location and the work will likely be more accurate.
Removing the mandrel from centers and with a 15/16 collet installed in the ER-40 holder, the collet assembly was slipped onto the turned part of the mandrel and the collet securely tightened.
Because the mandrel was on centers, there was no problem with losing concentricity when removing and re-installing it between centers.
The spindle registration diameter was bored but the area closest to the mandrel had to be left unfinished because the cutting tool (which was in a four way tool post) couldn’t approach the dead center.
An Armstrong tool holder would have worked perfectly in this situation but I didn’t have one to fit this small machine. Probably some ingenious use of a boring tool would also have been suitable but there was a convenient workaround anyway.
I chucked a short piece of one inch steel rod in the three-jaw and turned it to 15/16 diameter. The collet assembly was slipped over the turned diameter, tightened and the area left unfinished, from the previous operation, was faced slightly deeper.
No need for a pretty finish here so a fairly coarse cross-feed was used:
The completed part:
ER-40 collet chuck mounted to spindle:
Runout less than .001 measured three inches from the collet face. Good enough for my needs.
The goals of this project: To equip the small lathe with collets while a four jaw chuck will be more or less permanently installed on the larger lathe. This all happened about four years ago and to date, has been successful.
Having said that, when this topic was posted originally on another forum, a common sense response let the air out of my tires !
The responder wondered why, instead of taking the pains to maintain concentricity, I did not simply allow a certain amount of movement so that I could then dial it into alignment with a bit of careful tapping ?

As Tony Soprano would have said, "Whaddayagonnado ?"


![[Image: TomsTechLogo-Profile.png]](http://tomstechniques.com/wp-content/uploads/2013/11/TomsTechLogo-Profile.png)