07-12-2021, 08:36 PM
It actually is not what I did "today". It was actually several years in the making.
Several years ago, back when Harbor Freight had 20% Off coupons and steel was not outrageously expensive I bought their 1 Ton Capacity Telescoping Gantry Crane. I got the crate into my accessory building and then allowed it to sit in the middle of the floor for several years because it was so cluttered that I did not have any room to assemble it.
I finally took a few extra days after Memorial Day off, cleaned up enough stuff to be able to see the floor and put it together.
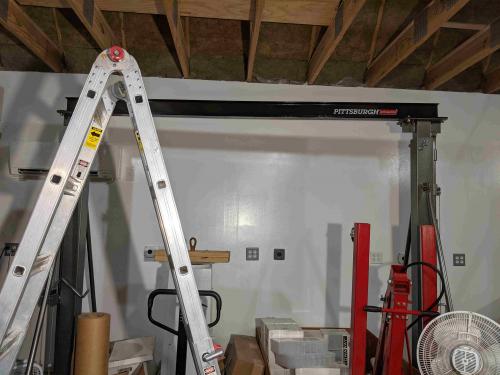
It takes up considerably less space now than it did when it was in the crate and it is on wheels so I can move it around. This is good. You may notice that there is no hoist attached to the crane. This does make it slightly less useful than it could be and is considered bad.
To remedy the 'no hoist' issue a trip to Harbor Freight was in order to get their 2000 Lb. Electric Hoist With Remote Control and two 1 Ton Push Beam Trolleys. Now all I had to do was put it all together.
This did present some challenges. As we all know, when you get something from Harbor Freight you should consider it a 'kit'. The hoist was no different. For some reason the Harbor Freight team thinks that a 6 foot power cord and a 5 foot pendant cable is long enough to be useful as that is what it comes with. The engineer who spec'd those items must not use this stuff or the hoists are mounted on very short cranes in the design lab.
A little internet searching brought 75 ft of SJOOW 12-3 (20 ft used for this application) and 50 ft of 14-4 SJOOW (used 16 ft) to my door. Liberal application of wire pulling lubricant got the one-size-larger cables back into the existing box and pendant and some ferrule crimping got all the wiring tidied up and working.
On to the next challenge. The bottom of the crane I-beam is 94 inches from the floor. The hoist weighs 80lbs. Each of the trolleys is 21lbs and has over 20 washers that are used to ensure the side plates are the correct distance apart for the width of the I-beam flange. I had to agree with Bev that "a ladder" was not the correct answer to the "how to you mount the hoist?" question.
Alternatives were considered.
The first step was to find some 3 x 3 x 3/8 angle iron in the bin. Drill appropriate holes in one edge to mount the angle iron to the top of the hoist using the original attachment points on the hoist. Then 1-1/32 inch holes to accommodate the bolts that go thru the trolley side plates. As a side note, be sure to break off the 1/8 inch bit you are using as the pilot hole for the 1-1/32 in holes. This immediately turns what should be a 30 minute job to drill 4 holes into a 4 hour foul language fest.
Having completed the machining of the mounting brackets they can be primed, painted and installed on the hoist, increasing the weight another 8lbs.
Next on the list is to address the "awkwardness" of the hoist. When it is upside down ...
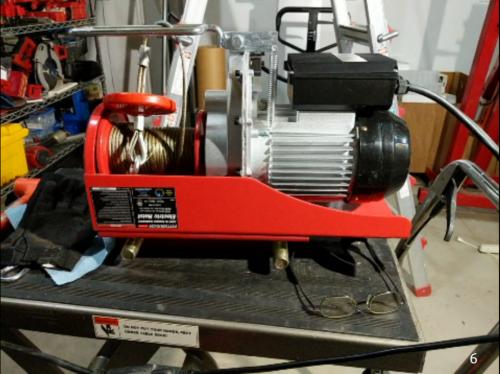
... it sits nicely on a flat surface. However, if you turn it right side up there is flat to hold it up, plus electrical box and the cable stop are the lowest item, neither of which are very strong.
The obvious answer is an OSHA approved holder to give the whole mess a box like appearance.
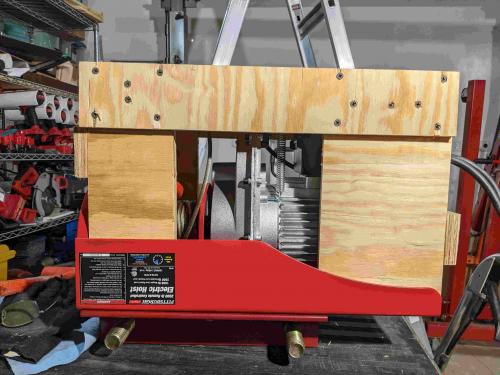
When flipped over is very stable. Ugly, but stable.
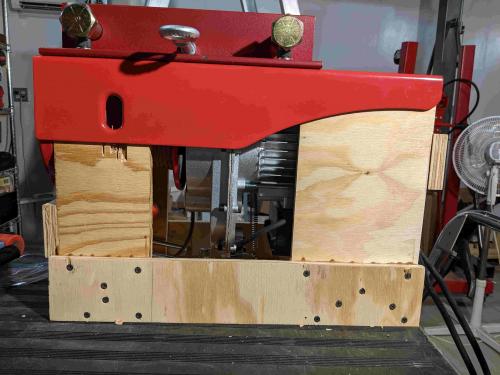
You may also notice that I replaced the 'rods' that came with the trolleys with 1 x 8 grade 8 bolts and the hex head cap screw hoist attachment bolts that came with the hoist with socket head cap screws. Had to do that to make all the bits and pieces fit together. Not seen is the replacement of the "assortment of washers to be xxx long" with custom spacers cut to length from 1 inch black iron pipe.
Finally, how to address the 94 inches from the floor to the bottom of the I-Beam. I have a 6ft. Baker-Style Scaffold (that would be 72 inches), a 1000 Lb. Capacity Hydraulic Table Cart that would go up 34 inches so simple math suggests the two of them would be greater than 94 inches. Your basic air-over-hydraulic foldable shop crane to do the heavy lifting and Bob's your uncle. What could go wrong?
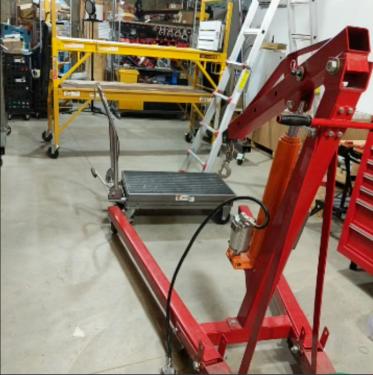
Some OSHA approved rigging ...
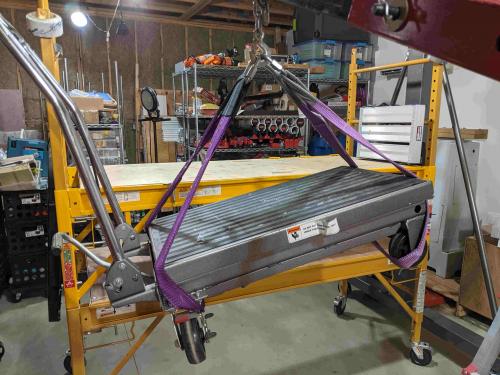
... followed by more OSHA approved rigging ...
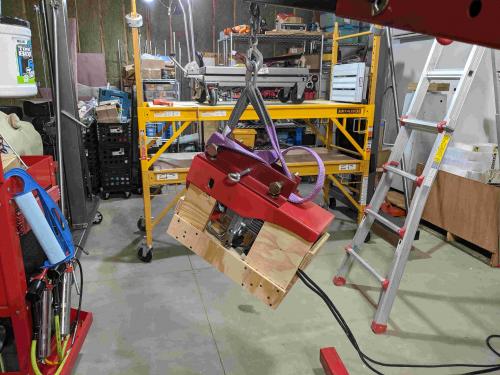
... some pumping on the hydraulic table and wa-la ... an OSHA approved work environment ...
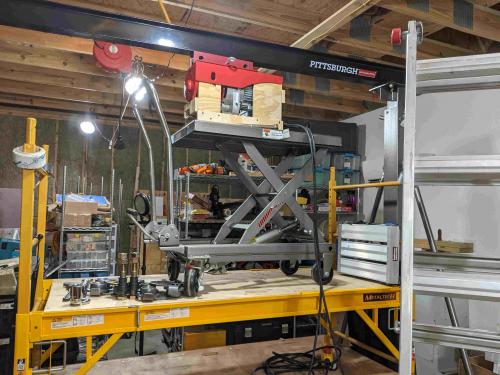
Bev did insist that I lock all of the wheels on the scaffold and hydraulic table before I entered the work environment. Safety first you know. She was kind enough to come out and watch all this happen. She brings a phone with her in case something comes off the rails and she needs to call for help.
A few trips up and down the ladder to make adjustments to get everything to fit was all it took. Side note: It seems that no matter how much you measure and dry fit while all the stuff is on the ground to ensure it will go together smoothly when in some inconvenient location there is still one little thing that doesn't quite fit when it counts and requires an Dremel adjustment.
The finished (almost) product ...
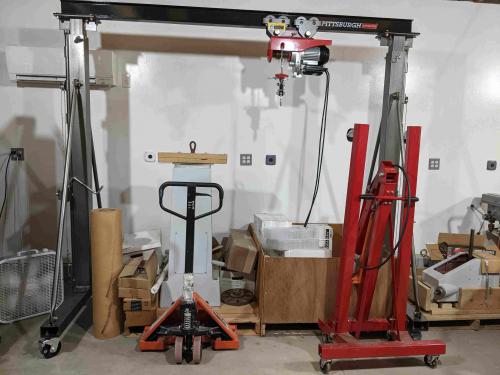
I need to fashion some cord holders along with crane height adjustment crank handle holders but that should only take a weekend to fabricate. Actually only about four hours but I now factor broken-bit time into my estimates.
Several years ago, back when Harbor Freight had 20% Off coupons and steel was not outrageously expensive I bought their 1 Ton Capacity Telescoping Gantry Crane. I got the crate into my accessory building and then allowed it to sit in the middle of the floor for several years because it was so cluttered that I did not have any room to assemble it.
I finally took a few extra days after Memorial Day off, cleaned up enough stuff to be able to see the floor and put it together.
It takes up considerably less space now than it did when it was in the crate and it is on wheels so I can move it around. This is good. You may notice that there is no hoist attached to the crane. This does make it slightly less useful than it could be and is considered bad.
To remedy the 'no hoist' issue a trip to Harbor Freight was in order to get their 2000 Lb. Electric Hoist With Remote Control and two 1 Ton Push Beam Trolleys. Now all I had to do was put it all together.
This did present some challenges. As we all know, when you get something from Harbor Freight you should consider it a 'kit'. The hoist was no different. For some reason the Harbor Freight team thinks that a 6 foot power cord and a 5 foot pendant cable is long enough to be useful as that is what it comes with. The engineer who spec'd those items must not use this stuff or the hoists are mounted on very short cranes in the design lab.
A little internet searching brought 75 ft of SJOOW 12-3 (20 ft used for this application) and 50 ft of 14-4 SJOOW (used 16 ft) to my door. Liberal application of wire pulling lubricant got the one-size-larger cables back into the existing box and pendant and some ferrule crimping got all the wiring tidied up and working.
On to the next challenge. The bottom of the crane I-beam is 94 inches from the floor. The hoist weighs 80lbs. Each of the trolleys is 21lbs and has over 20 washers that are used to ensure the side plates are the correct distance apart for the width of the I-beam flange. I had to agree with Bev that "a ladder" was not the correct answer to the "how to you mount the hoist?" question.
Alternatives were considered.
The first step was to find some 3 x 3 x 3/8 angle iron in the bin. Drill appropriate holes in one edge to mount the angle iron to the top of the hoist using the original attachment points on the hoist. Then 1-1/32 inch holes to accommodate the bolts that go thru the trolley side plates. As a side note, be sure to break off the 1/8 inch bit you are using as the pilot hole for the 1-1/32 in holes. This immediately turns what should be a 30 minute job to drill 4 holes into a 4 hour foul language fest.
Having completed the machining of the mounting brackets they can be primed, painted and installed on the hoist, increasing the weight another 8lbs.
Next on the list is to address the "awkwardness" of the hoist. When it is upside down ...
... it sits nicely on a flat surface. However, if you turn it right side up there is flat to hold it up, plus electrical box and the cable stop are the lowest item, neither of which are very strong.
The obvious answer is an OSHA approved holder to give the whole mess a box like appearance.
When flipped over is very stable. Ugly, but stable.
You may also notice that I replaced the 'rods' that came with the trolleys with 1 x 8 grade 8 bolts and the hex head cap screw hoist attachment bolts that came with the hoist with socket head cap screws. Had to do that to make all the bits and pieces fit together. Not seen is the replacement of the "assortment of washers to be xxx long" with custom spacers cut to length from 1 inch black iron pipe.
Finally, how to address the 94 inches from the floor to the bottom of the I-Beam. I have a 6ft. Baker-Style Scaffold (that would be 72 inches), a 1000 Lb. Capacity Hydraulic Table Cart that would go up 34 inches so simple math suggests the two of them would be greater than 94 inches. Your basic air-over-hydraulic foldable shop crane to do the heavy lifting and Bob's your uncle. What could go wrong?
Some OSHA approved rigging ...
... followed by more OSHA approved rigging ...
... some pumping on the hydraulic table and wa-la ... an OSHA approved work environment ...
Bev did insist that I lock all of the wheels on the scaffold and hydraulic table before I entered the work environment. Safety first you know. She was kind enough to come out and watch all this happen. She brings a phone with her in case something comes off the rails and she needs to call for help.
A few trips up and down the ladder to make adjustments to get everything to fit was all it took. Side note: It seems that no matter how much you measure and dry fit while all the stuff is on the ground to ensure it will go together smoothly when in some inconvenient location there is still one little thing that doesn't quite fit when it counts and requires an Dremel adjustment.
The finished (almost) product ...
I need to fashion some cord holders along with crane height adjustment crank handle holders but that should only take a weekend to fabricate. Actually only about four hours but I now factor broken-bit time into my estimates.


