OK - now that winter is here, I spent a little time on the weekend on the babington burner. One of the issues I had since making the rear plate was that it restricted the airflow into the back of the burner. Such is the fun of taking something from a test platform to a self contained unit.
The first modification was to cut the entire bottom half of the rear plate out, leaving just enough metal to maintain the circumference to facilitate it being bolted in place.
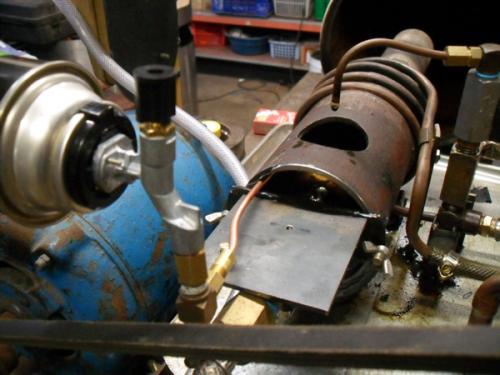
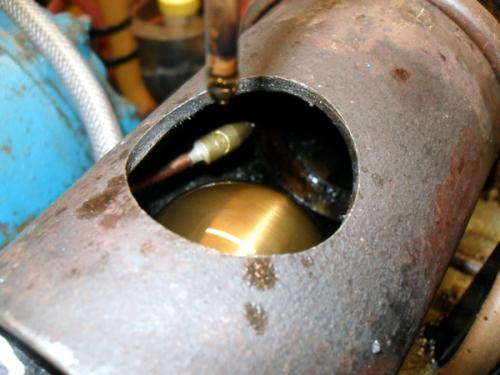
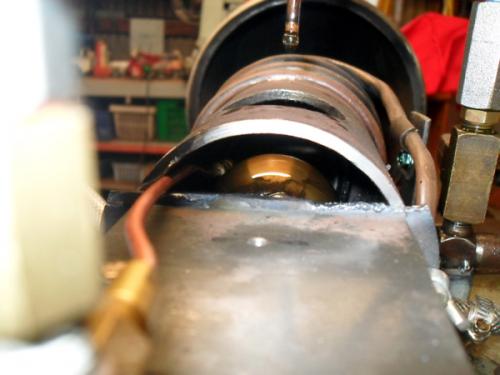
The second is that the gas pilot causes the oil to move away from the ball. The solution here was to use a small burner tip on a length of annealed copper line that a friend gave me. This worked much better and I was able to position it so it sits to the side of the ball and slightly in front. This prevents the pilot flame from disrupting the oil flow onto the ball. With this sorted out, a mounting point for the little gas can was added.
The next step was to add the air control. I dug out on old regulator that has the psi on the stem, so the numbers disappear under the handle as the pressure is increased (a bit like a torque wrench). I forgot to get a photo of this. I added a tap so that the air can be shut off. A ball cock would have been better but this is built from things on hand. In fact, the gas can (about $6 for a 4 pack) is the only financial investment so far
OK - time for the pictures:
These three are mainly to show the evolution from its beginnings on lab stands and gravity feed, to a self contained unit.
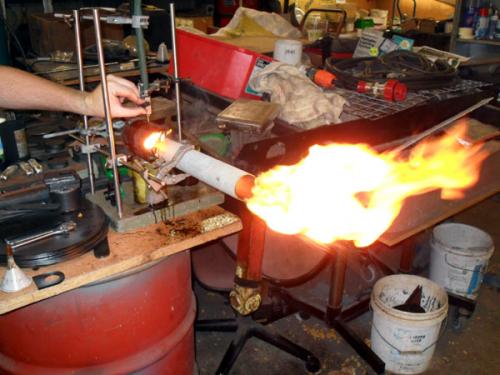
This one shows the original plan for the pilot burner:
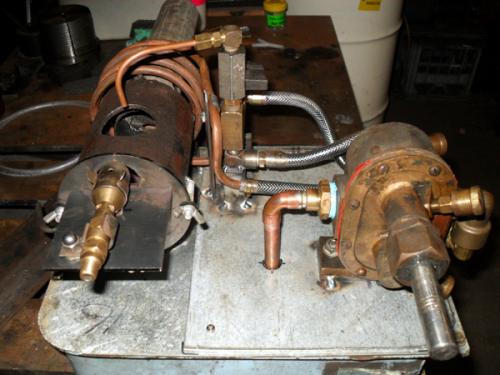
How it currently looks:
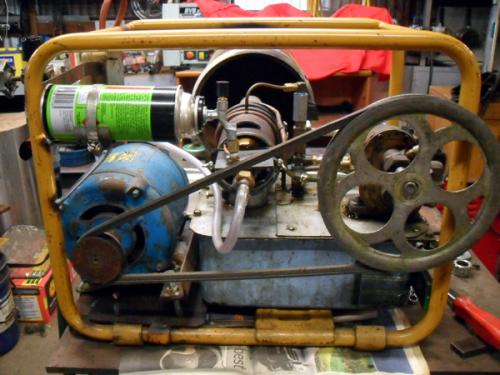
Side view showing the pump switch and air control:
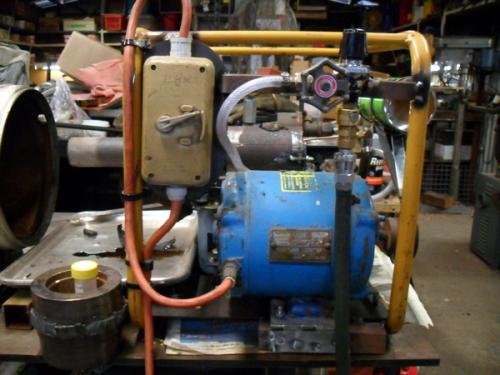
A few shots showing the pilot system:
I'll see if I can remember to get a video of it running. Once I am happy with how it performs, I'll rebuild some parts.
The first modification was to cut the entire bottom half of the rear plate out, leaving just enough metal to maintain the circumference to facilitate it being bolted in place.
The second is that the gas pilot causes the oil to move away from the ball. The solution here was to use a small burner tip on a length of annealed copper line that a friend gave me. This worked much better and I was able to position it so it sits to the side of the ball and slightly in front. This prevents the pilot flame from disrupting the oil flow onto the ball. With this sorted out, a mounting point for the little gas can was added.
The next step was to add the air control. I dug out on old regulator that has the psi on the stem, so the numbers disappear under the handle as the pressure is increased (a bit like a torque wrench). I forgot to get a photo of this. I added a tap so that the air can be shut off. A ball cock would have been better but this is built from things on hand. In fact, the gas can (about $6 for a 4 pack) is the only financial investment so far

OK - time for the pictures:
These three are mainly to show the evolution from its beginnings on lab stands and gravity feed, to a self contained unit.
This one shows the original plan for the pilot burner:
How it currently looks:
Side view showing the pump switch and air control:
A few shots showing the pilot system:
I'll see if I can remember to get a video of it running. Once I am happy with how it performs, I'll rebuild some parts.
Hunting American dentists since 2015.


