Posts: 736
Threads: 34
Joined: Feb 2012
Location: Minneapolis, MN
The following 2 users Like arvidj's post:
EdK (03-03-2022), Vinny (03-04-2022)
(03-03-2022, 01:28 PM)Highpower Wrote: (03-02-2022, 05:45 PM)arvidj Wrote: Certainly not a tutorial on bridging but it can give you an idea on what is possible ... and especially not possible ... Bridging ... until you get your printer tuned up.
It just happened to be the first page listed by google when I searched for "3d printing bridging".
I started watching several videos and reading some web sites and (I think) I learned a few more things. Bridging and overhangs are not one in the same. Bridging involves anchoring between two points whereas overhangs are only supported from one side. It's like two people holding up a yardstick between them using only their fingertips vs. one person holding a yardstick horizontally from one end of the stick only with their fingertips. In all the examples of bridging I saw both ends were supported all the way down to the table. I did not see any examples of bridging that started half-way up the part and off of the table. I didn't spend all night looking for such a case though.
From what I saw the trick is to get the material to solidify the instant it comes out of the hot nozzle which requires a lot of air flow to cool the extrusion immediately upon exit from the nozzle. Between having to get the melt temperature just right, getting the cooling ability just right and having to fight gravity the entire time makes me glad I didn't go down the 3D path after all. Not enough time left on my calendar to try to learn it all. 
Kudo's to the ones that can pull it off though. 
Agreed that, in the end, bridging and overhang are two different things. But if you think about it, until the bridge is created it is a hell-of-a overhang.
The extruder does not put out a 'ruler' that is immediately supported at both ends but a 'stream of hot plastic' that has to start at one end or the other and then, eventually, end up at the other end. As such, until it gets to the other end, it is, at least in my mind, an overhang.
Posts: 4,460
Threads: 184
Joined: Feb 2012
Location: Missouri, USA
(03-03-2022, 07:07 PM)arvidj Wrote: Agreed that, in the end, bridging and overhang are two different things. But if you think about it, until the bridge is created it is a hell-of-a overhang.
The extruder does not put out a 'ruler' that is immediately supported at both ends but a 'stream of hot plastic' that has to start at one end or the other and then, eventually, end up at the other end. As such, until it gets to the other end, it is, at least in my mind, an overhang.
I agree with that. I still think it's black magic or witchcraft to be able to pull that off in mid-air. At least while in Earth's gravity. On the ISS, not so much. 
Willie
Posts: 4,683
Threads: 93
Joined: Feb 2012
Location: Perth, Australia
Willie - there is a fan that cools the plastic as soon as it is printed (or close to).
Hunting American dentists since 2015.
Posts: 4,460
Threads: 184
Joined: Feb 2012
Location: Missouri, USA
(03-04-2022, 09:35 AM)Mayhem Wrote: Willie - there is a fan that cools the plastic as soon as it is printed (or close to).
Yeah, I originally thought those fans were there to prevent the hot head from overheating. 
Since then I've read that multiple fans are sometimes needed from multi-directions to cool things fast enough to do things like overhangs and bridging. It seems like a steep learning curve with lots of variables to deal with to get it right. Too much for me to try to learn at this point. I'll leave it to the folks with experience.
Willie
Posts: 771
Threads: 48
Joined: Mar 2012
Location: Rochester, NY
Most printers have two fans on the head. One to cool the heatsink where the filament enters, the other to cool the filament as it is extruded. A very common upgrade is dual fans for filament cooling, and there are a slew of different designs for most printers. I bought dual fans to upgrade, but have yet to print the new duct to mount them. I also bought a new, larger fan for the motherboard, but never got around to installing it.
Full of ideas, but slow to produce parts
Posts: 8,860
Threads: 319
Joined: Feb 2012
Location: Arizona/Minnesota
Posts: 4,460
Threads: 184
Joined: Feb 2012
Location: Missouri, USA
Wow. That looks great Ed! 
Did you get the email I sent you earlier?
Willie
Posts: 8,860
Threads: 319
Joined: Feb 2012
Location: Arizona/Minnesota
(03-04-2022, 12:59 PM)Highpower Wrote: Wow. That looks great Ed! 
Did you get the email I sent you earlier?
Just checked my email. Got it and responded.
Ed
Posts: 4,460
Threads: 184
Joined: Feb 2012
Location: Missouri, USA
(03-04-2022, 02:03 PM)EdK Wrote: (03-04-2022, 12:59 PM)Highpower Wrote: Wow. That looks great Ed! 
Did you get the email I sent you earlier?
Just checked my email. Got it and responded.
Ed
Check it again. Just don't delete it! 
Willie
Posts: 4,460
Threads: 184
Joined: Feb 2012
Location: Missouri, USA
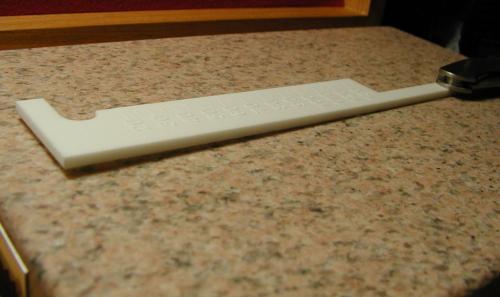
The dedicated 3D ruler I ordered from Xometry showed up today (2 days early) so I wasn't expecting it. I have to say I find it somewhat disappointing. The surface is what I would describe as a pebble finish. I expected it would be smooth but that isn't important other than it will hold onto grime from my filthy paws. It is also bowed a bit from end to end which I suspect is from being crammed into the box diagonally instead of laying across a flat bottom. Hopefully it will straighten out when I attempt to put some color into it with some RIT synthetic dye in a near-boiling water bath.
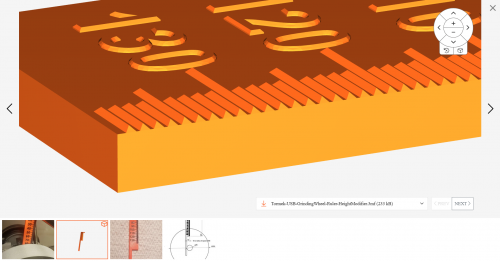
The drawings for this part show nice sharp triangular divisions and crisp lettering. What I have are truncated markings that are somewhat flat and wide. Almost like they didn't finish the last couple of layers? I don't know. I only got the one picture before the batteries in my camera died (naturally) and was going to show how the radius at the top 'hook' has a flat at the bottom instead of being perfectly 'round'. The radius is for locating the inside edge of the ruler in line with the center of the jig support bar and the center of the machine spindle. I guess I can try touching it up with a reamer.


Willie
|


