08-21-2017, 07:03 PM
This relates to the “shop-made tools” thread, post #283 of the following: http://www.metalworkingfun.com/showthrea...99&page=29
Some years ago, a European company, whose name I have forgotten, provided a collet assembly for the Austrian-made Emco-Maier “Compact 8” lathe. The system was no longer available at the time that I decided to equip my small Emco with collets.
Not surprising since the “Compact 8” was also unavailable by that time. However, a 5C system was still available from a distributor in the U.S. I didn’t care for it because the length caused excessive overhang:
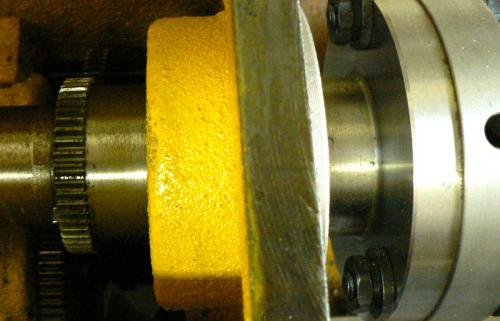
This is where the project begins - note that all of the turning operations were performed by the Emco itself, keeping the work in the family so to speak :o)
------------------------------------------------------------------------------------------------------------
I had purchased an imported ER-40 collet chuck with R8 arbor for a vertical mill but it had excessive runout. I cut off the R8 shank and put it aside for a possible future use, keeping the collet holding portion.
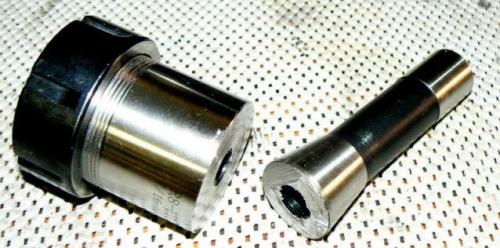
I found a semi-finished cast-iron lathe backplate on the internet (it cost less than a blank steel dropout and required a LOT less machining time).
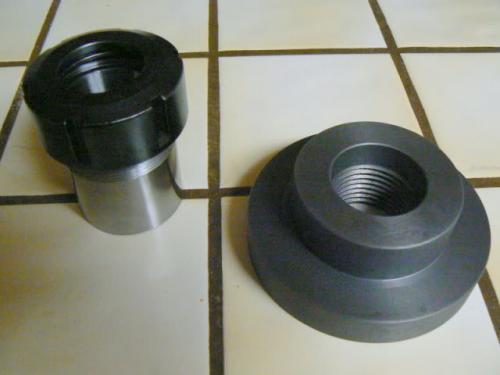
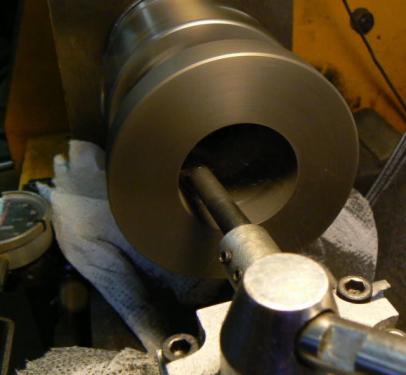
After determining the correct allowances for a shrink fit to the ER-40 collet chuck O.D. I bored the backplate accordingly. (Note the paper towels scattered around to keep cast iron chips off of the ways.)
The collet chuck was chilled in the kitchen freezer while the cast backplate was heated in the 450 degree kitchen oven for an hour and then the two parts were assembled. As they cooled, they became permanently joined.
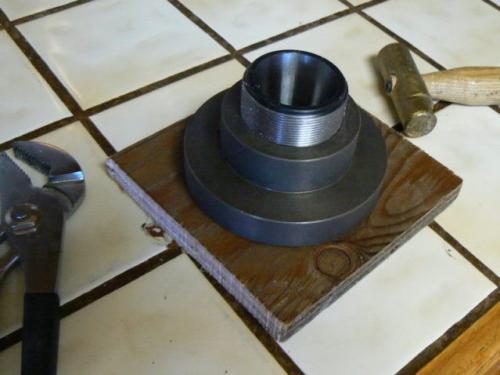
The assembly was clamped to the vertical mill table and the collet holder taper dialed true to the mill axis. Next operation was plunging a 1 inch end mill about an inch deep to serve as a pilot for a 1 inch drill.
Note the stack of plywood scraps under the backplate to protect the mill table from damage as the drill breaks through.
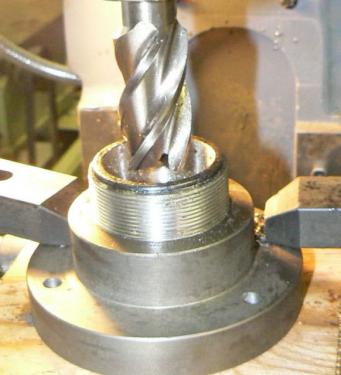
The end mill wasn’t long enough to plunge through the the complete assembly. But, serving as a boring tool, it produced a good pilot for starting a one inch drill correctly on axis. I was surprised (and gratified) that the collet chuck wasn’t hardened !
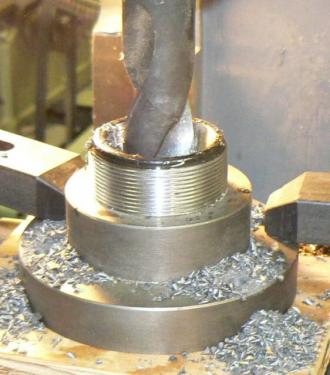
Drilling through the collet chuck (most of the chips are from the previous boring operation with the end mill):
(Continued In Part 2)
Some years ago, a European company, whose name I have forgotten, provided a collet assembly for the Austrian-made Emco-Maier “Compact 8” lathe. The system was no longer available at the time that I decided to equip my small Emco with collets.
Not surprising since the “Compact 8” was also unavailable by that time. However, a 5C system was still available from a distributor in the U.S. I didn’t care for it because the length caused excessive overhang:
- impaired the lathe’s spindle rigidity
- Amplified any runout in spindle and the collet assembly
- Reduced the (already small) 8 x 18 work envelope
- I’d used ER-40 collets satisfactorily on my horizontal mill
- Each ER-40 collet accommodates a full 1/16 inch range (unlike most common collet designs) reducing the number of collets needed
- Tighter gripping power, in my opinion, than most collets due to longer grip length and 3 or 4 times as many gripping “fingers”
- Collets would be interchangable between mill and lathe, eliminating the need for two full sets of collets (two collet chucks would still be required)
- Design would be shorter than 5C collet holders, reducing extension and overhang by some two inches
- Shorter collet holders = more rigidity and greater work envelope
- Tightens from the headstock end, not through the small spindle bore
This is where the project begins - note that all of the turning operations were performed by the Emco itself, keeping the work in the family so to speak :o)
------------------------------------------------------------------------------------------------------------
I had purchased an imported ER-40 collet chuck with R8 arbor for a vertical mill but it had excessive runout. I cut off the R8 shank and put it aside for a possible future use, keeping the collet holding portion.
I found a semi-finished cast-iron lathe backplate on the internet (it cost less than a blank steel dropout and required a LOT less machining time).
After determining the correct allowances for a shrink fit to the ER-40 collet chuck O.D. I bored the backplate accordingly. (Note the paper towels scattered around to keep cast iron chips off of the ways.)
The collet chuck was chilled in the kitchen freezer while the cast backplate was heated in the 450 degree kitchen oven for an hour and then the two parts were assembled. As they cooled, they became permanently joined.
The assembly was clamped to the vertical mill table and the collet holder taper dialed true to the mill axis. Next operation was plunging a 1 inch end mill about an inch deep to serve as a pilot for a 1 inch drill.
Note the stack of plywood scraps under the backplate to protect the mill table from damage as the drill breaks through.
The end mill wasn’t long enough to plunge through the the complete assembly. But, serving as a boring tool, it produced a good pilot for starting a one inch drill correctly on axis. I was surprised (and gratified) that the collet chuck wasn’t hardened !
Drilling through the collet chuck (most of the chips are from the previous boring operation with the end mill):
(Continued In Part 2)


