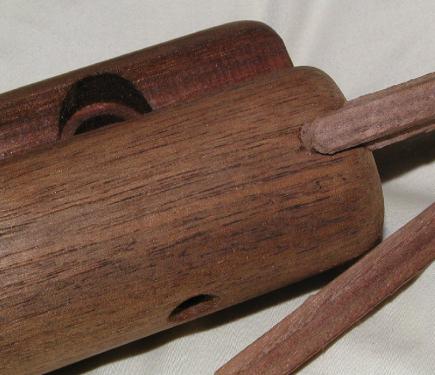
Question for the woodworkers...
#11
(10-10-2013, 12:51 PM)Highpower Wrote: Well, I have the regular white - and I have some brown carpenters glue also.
Aren't they about the same thing? I thought the brown might blend in (hide) better? 17428

...

Brown carpenters glue is just yellow carpenters glue tinted brown so it hides better. White and yellow glue are basically the same with yellow being a bit stronger. Try to get as good a fit as possible with the patch otherwise the glue seam will be hard to hide and probably doesn't take tung oil very well compared to the wood.

Ed
Reply
Thanks given by:
#12
Tom is probably right that white glue will work, yellow glue is maybe better.
When I want to do an invisable repair in wood I am very careful about lining up the grain in the correct direction, wet both pieces with denatured alcohol and look at them in the same light, in the same direction. One way will look darker than the other.
My next favorite trick is to glue the repair in with 5 minute epoxy tinted with a little powdered stain. Be careful, a little goes a long way (stain and glue).
Larry
LJP, proud to be a member of MetalworkingFun Forum since Aug 2013.
Reply
Thanks given by:
#13
Either of those will work well Willie. The yellow is a little stronger and more water resistant than the white but it doesn't matter in this case since you don't need a lot of strength and it will be oiled for protection.

Tom
[Image: TomsTechLogo-Profile.png]
Reply
Thanks given by:
#14
From what I've read the white and yellow are the same strength but the yellow sets quicker. Either should be fine,
Tung oil is a penetrating oil, soaks into the wood, where linseed or furniture oil is a surface finish that you can build in layers for a deep finish.
Free advice is worth exactly what you payed for it.
Greg
Reply
Thanks given by:
#15
Thanks for all the great tips guys. Smiley-eatdrink004

So what do you think about this? If I make the plug a good snug fit, would there be any problem with putting a thin coat of glue on the bottom of the dovetail ONLY? Or would the sides show up as "cracks" with changes in humidity without glue holding them?

I've got plenty of two part epoxy and colored dye (bedding compound) but that always shows up as a glossy line. And it won't take any wood stain or finish. It's not a problem when used as bedding material since it's expected. But it does stand out.

My white 'Elmers' glue seems to be thinner than the brown glue. Is it possible to thin out the brown with anything? Water, alcohol.... ? 17428
Willie
Reply
Thanks given by:
#16
Willie, use the white glue. Make your piece as tight as possible but put glue on all the surfaces that touch.
LJP, proud to be a member of MetalworkingFun Forum since Aug 2013.
Reply
Thanks given by:
#17
I would use the white as well since I don't know what your "brown" glue is, unless it is Titebond, then either one will work. Don't worry about getting sloppy, just wipe any excess off with a wet rag.

Tom
[Image: TomsTechLogo-Profile.png]
Reply
Thanks given by:
#18
OK all. You guys have convinced me. White glue and a tight fit-up it is! Smiley-eatdrink004

On the plus side, the piece of walnut that Tom sent me is big enough to cut several strips of 'key stock' from that I can get different spacing and angles of the grain to choose from for the best match.

Larry, I like your tip about wetting the wood with denatured alcohol to check for a color mismatch too. I would have done that dry. Slaphead

Thanks again gentlemen. Cool
Willie
Reply
Thanks given by:
#19
Well I guess it's all over except for the crying now. Bawling

On my first attempt at the filler piece, I found what looked like a good section of grain to use and started cutting the side angles. Measured carefully and got a good tight fit to the dovetail. Then I noticed my mistake. The nice section of grain I chose wound up on the bottom of the filler piece. Of course when I flipped it over the grain on the top was running 25° off in another direction from the stock. Bash
Wetting both pieces per Larry showed the filler piece was lighter in color anyway.

So on the next try I chose a darker section of the walnut Tom had sent, and made sure to get the grain I wanted facing in the right direction this time. I cut the angles on the second filler piece, and tested it for fit. Wet down the wood again and it looks pretty good to me. (But what do I know?)

Then I had to sand down one end of the filler piece to match the 60° angle of the dovetail and it's 3/32" radius. So I set the table of my belt sander to 60° and started sanding the radius into the end. After that I opened up my bottle of white glue and spread a thin coat on both pieces. Tapped the filler piece into the dovetail with a small hammer until it stopped, and the excess glue was forced out around the edges.

I wiped off the excess with a wet rag and then saw what I was dreading all along. A thin glue line around the radius of the filler on the outside of the stock. Apparently I must have lifted the piece off of the belt sander table a bit when I was doing the radius and ended up with 58° instead of 60° because there is the slightest gap at the top. Slaphead

I'll just have to see what I can do with it when it comes time to blend the two pieces together. Blink

       
Willie
Reply
Thanks given by:
#20
Willie,

It's tough to get end grain to match. If I had realized what you were doing sooner I would have suggested that you cut the dovetail on an angle so it went all the way through, then there would have been no end grain to match. I'm sure it will look fine once you get it oiled up.

Tom
[Image: TomsTechLogo-Profile.png]
Reply
Thanks given by:


Users browsing this thread: 3 Guest(s)