Posts: 4,493
Threads: 187
Joined: Feb 2012
Location: Missouri, USA
The following 2 users Like Highpower's post:
PixMan (05-05-2014), EdK (05-05-2014)
Well.... it's a Craftsman tool actually, that I bought probably 25 years ago. It still runs fine and does a good job for what it is, but I've often wished I could get more out of this tool. It's a variable speed motor but the speed knob is on the very top of the plastic motor housing and it hangs from the "ceiling" over my work bench. With my bad shoulders it get to be a real pain (literally) sometimes to change the speed. It's also limited to light duty work with small 1/8" shank tools.
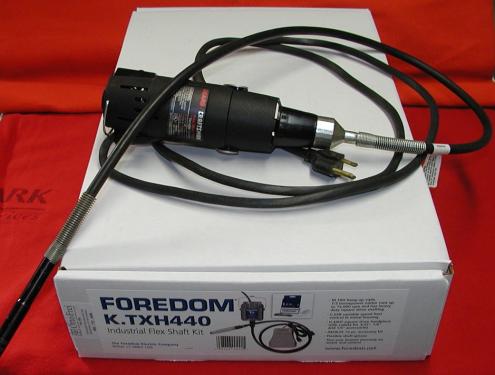
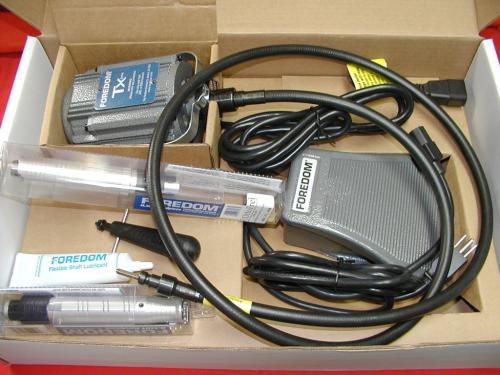
There have been many times I wished I could have chucked up a 1/4" carbide burr right there at the bench, instead of having to turn on the air compressor, drag an air hose across the shop, and dig a die grinder out of the toolbox.
That won't be a problem any more, and speed control will be a breeze now too. 
Willie
Posts: 8,888
Threads: 320
Joined: Feb 2012
Location: Arizona/Minnesota
Very nice Willie! I've been tempted to get one of those for many years but have never bitten the bullet. After you've got some stick time on it, you should do a review in the Product Reviews forum.
Ed
Posts: 4,683
Threads: 93
Joined: Feb 2012
Location: Perth, Australia
(05-04-2014, 08:59 PM)Highpower Wrote: ...the speed knob is on the very top of the plastic motor housing and it hangs from the "ceiling" over my work bench. With my bad shoulders it get to be a real pain (literally) sometimes to change the speed...
Just hope your ankle doesn't give in 
A review would be good.
Hunting American dentists since 2015.
Posts: 4,493
Threads: 187
Joined: Feb 2012
Location: Missouri, USA
The following 2 users Like Highpower's post:
EdK (05-05-2014), stevec (05-05-2014)
(05-05-2014, 06:57 AM)Mayhem Wrote: Just hope your ankle doesn't give in 
Oh great! Yeah, that's not going to jinx me...... thanks a lot!
I'll show you! I'll just shove the pedal down with my cane and wedge it under the work bench.   
But yes, let me get some time in playing with it and I'll do a review.
I've got another project to start on where I can put it to good use.
Willie
Posts: 4,493
Threads: 187
Joined: Feb 2012
Location: Missouri, USA
The following 2 users Like Highpower's post:
EdK (05-09-2014), stevec (05-09-2014)
05-09-2014, 12:19 PM
(This post was last modified: 05-14-2014, 09:16 PM by Highpower.)
Speaking of Dremel tools.... I just found my very first moto-tool purchase buried under the mess covering my workbench. 
It's a corded, variable speed Dremel model 380-6 (yes, it's OLD) that I used the snot out of, until the front bearing started squealing like a banshee. Apparently they all suffer this fate, usually sooner than later. It also appears to have gotten wet some time ago and has been slowly working on growing a beard of rust. 
I was getting ready to toss it in the bin and as usual I just couldn't bring myself to do it. Like so many other things, modern day offerings are made even more cheaply now. I believe the latest Dremels have a two-piece shaft now with a plastic tube connecting the motor shaft and the spindle shaft. It seems the tube connector is another failure point now in these tools. My old 380 model has a solid one piece shaft. With that in mind I thought it might be worth trying to "save" the old girl so I tore it apart.
I cleaned up all the bits and pieces, and removed the rust. Surprisingly the motor brushes still have plenty of life in them. And then I turned my attention to the bearings. Long story short... the bearings have no part number on them. Only "NHBB" with means New Hampshire Ball Bearing, who are apparently no longer in business. Measuring the bearings reveals that they are a non-standard size made as a proprietary part for Dremel alone. Dremel of course, no longer stocks them and wouldn't sell them to you anyway. They only sell armature "assemblies".
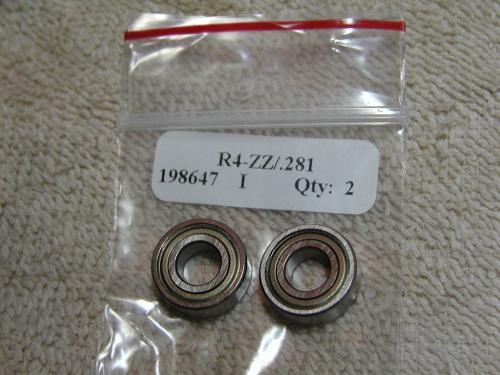
Thankfully, for anyone else interested -- Boca Bearings has them in the special 9/32" ID size. Part # R4-ZZ/.281
Two new bearings on the way. Results to follow. 
Willie
Posts: 2,685
Threads: 29
Joined: Feb 2012
Location: Nova Scotia, Canada
I clicked "like" for the post, but please Willie give us a follow up when you receive and install them. 
Busy Bee 12-36 lathe, Busy Bee Mill drill, Busy Bee 4x6 bandsaw, Homemade 9x17 bandsaw, Ad infinitum.
Posts: 8,888
Threads: 320
Joined: Feb 2012
Location: Arizona/Minnesota

Ed
Posts: 4,493
Threads: 187
Joined: Feb 2012
Location: Missouri, USA
Will do guys. It's just a pile of parts right now while I'm waiting to get the bearings. First class mail (no tracking) so no clue as to when I'll get them.
One thing that did irk me a little bit, was that I searched the Boca web sight high and low looking to see if they had a minimum order amount and couldn't find one listed. So I went ahead and just ordered the 2 bearings. Low and behold when I got the order confirmation I see they hit me with the extra "handling" charge. Had I known that ahead of time I probably would have just ordered a couple more for spares. I also got to thinking about what an odd amount it was (17.95) for a minimum order. 
Then I did the math and realized that if I ordered 3 bearings, I would have still been 10 cents short of the minimum. Sneaky bar-stewards.... 
Quote:Thank you for the following order :
Product Qty Price Each Discount Discounted Price Total
R4-ZZ/.281 2 $5.95 $0.00 $5.95 $11.90
Handling of $3.95 applied for order under $17.95.
Subtotal : $11.90
Sales Tax : $0.00
Order Discount : $0.00
Shipping via US MAIL-1ST CL FREE to xxxxx : $0.00
Handling Charge : $3.95
Total : $15.85
Willie
Posts: 4,493
Threads: 187
Joined: Feb 2012
Location: Missouri, USA
The following 2 users Like Highpower's post:
EdK (05-10-2014), Mayhem (05-10-2014)
The area's inside the red boxes is where things were rusted up. I had to take the shaft to the wire wheel on the bench grinder to get the majority of the rust off before I could disassemble the motor. The fan blades and end bell latch springs I had to clean off in the bead blast cabinet. They have some minor pitting showing now. They used to be bright shiny steel, but I applied some cold gun blue to try and give them some rust protection in the future.
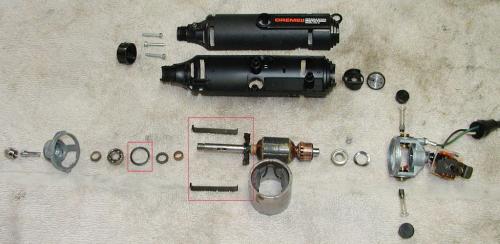
The front bearing was covered in a metallic dust/grit slurry from all the grinding and sanding operations during use, although I did blow things out from time to time with compressed air. After I got the bearings off of the shaft I popped the metal shields off of the front one and washed it out to check out the damage. No more crunchy noises when spinning the outer race, but it does have a bit of "slop" now. Without the shields it would never survive again anyway. I also spun the armature in the lathe to clean up the commutator a little and to polish the shaft up a bit. When I was doing that I noticed that the fan blades were wobbling pretty badly. Hmmmm, that's not good... 
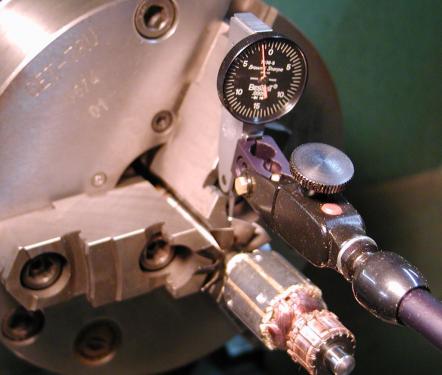
So to restore the balance and remove vibration I set up a DTI and carefully started bending the fan blades to get them aligned again. Got them all to within .005" and called it good enough. Just waiting on the new bearings now....
Willie
Posts: 4,493
Threads: 187
Joined: Feb 2012
Location: Missouri, USA
The following 1 user Likes Highpower's post:
tackit (05-29-2014)
Got the new bearings in the mail today. These have no markings on them anywhere. But they are the correct size so that's what counts.
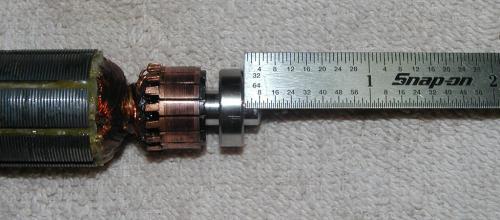
Installed the rear bearing on the armature shaft, making sure that it was in the same spot as the old bearing. 7/64" from the square edge of the shaft. The shaft end is rounded. (I measured it before removing the old bearing.)
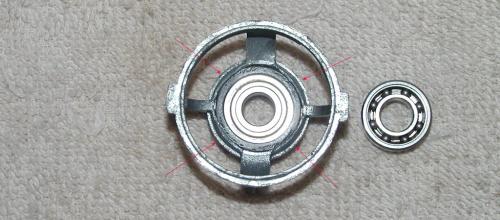
Then installed the front bearing in the end bell, put in the retaining ring and crimped it back into place. You have to carefully tap around the inside lip of the end bell (red arrows) to open it up in order to remove the original bearing.
Piece the motor back together and insert it and the speed controller back into the case halves. Re-install the brushes and it's done.
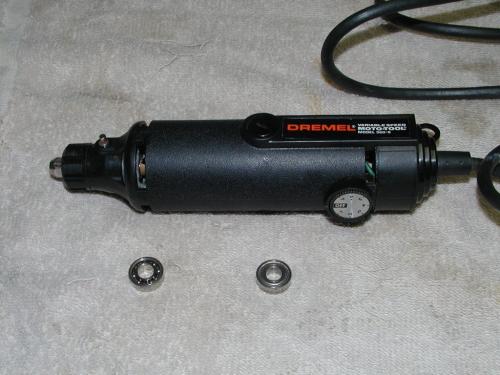
Final results: Mixed.
The good news - the motor runs quiet again (well, for a Dremel) with no screeching noise, and the nose of the tool stays cool. It would heat up quickly with the bad bearing and become uncomfortable to hold.
The bad news - I didn't fix my speed control issue. It lost most of it's variable speed right before the bearing went bad. While I had it apart I flushed out the rheostat(?) / potentiometer(?) with some contact cleaner (DeOxit-5) in hopes that it would revive the mid range of the speed control. But no luck on that front. The speed dial is marked 1-7 and from 1 to about 5-1/2 the tool only runs at slow speed. From there it ramps up quickly to full speed at "7". It's not a linear increase in speed over the entire dial.
In the end, it's basically a one speed tool now, but at least it's usable again. It will make a good "loaner". 
Willie
|


